Making pictures using seeds
Go on a seed hunt, act out germination, create seed mosaics, taste seeds, and more in this fun lesson on plants! This is part 1 of a 5 part unit study on Botany and Plants. This lesson is geared toward 2nd-3rd grade level children and their siblings. I created this to do with a weekly homeschool co-op which meets each week for 2 1/2 hours. Use this fun lesson with your classroom, family, after school club, camp, or co-op!
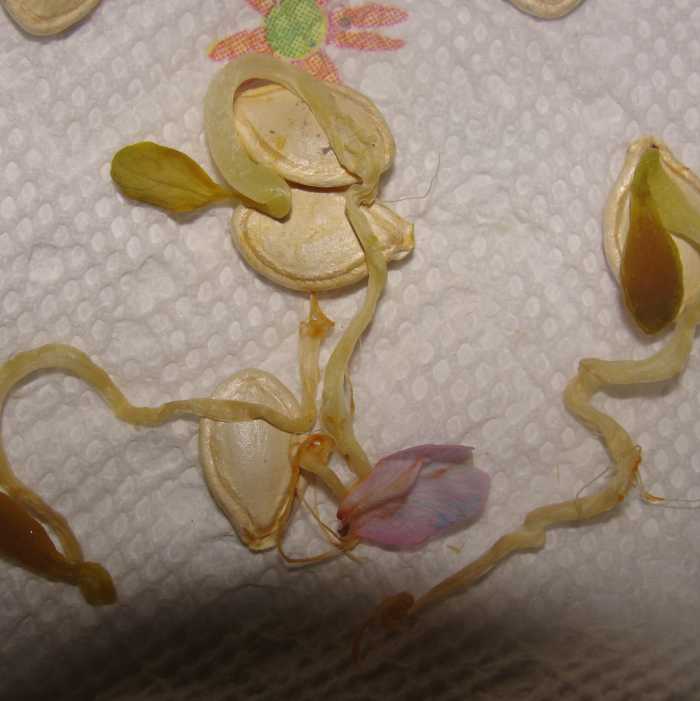
Early Prep: Germinate Seeds
Begin germinating lima bean and corn seeds at least a few days before you plan to teach the lesson.
(*At least a few days or up to a week before your class/co-op, place some popcorn kernels and dried lima beans in moist paper towels. Place the paper towels with the kernels & seeds in a plastic bag. Keep the paper towels moist, but not dripping wet. The seeds will soon begin to germinate! You’ll use the seeds to show the children the difference between monocot and dicot seeds. They are always amazed to see popcorn kernels sprouting!*)
YOU WILL NEED:
- dried beans (like lima beans) and corn seeds (popcorn kernels that haven’t been cooked will work)
Book to use for this entire unit on plants
Part 1: Identify Seed Parts & Types
Observing seeds
- Read Bible story regarding seeds such as Matthew 7:15-23, 21:18-22, & 12:33-37. We read the parable of the sower from Matthew 13:1-23. (Show pictures from Bible stories as you read.)
- Read Oh Can You Say Seed? by Bonnie Worth or Seeds! Seeds! Seeds! by Nancy Elizabeth Wallace, which is perfect for preschoolers or early elementary aged children. A grandparent sends a package full of seed-related items, and the child (Buddy Bear) opens a gift each day and learns something new about seeds. It covers the germination process, plant parts, fun activities to do with seeds, and more.
YOU WILL NEED: Oh Can You Say Seed? by Bonnie Worth, Seeds! Seeds! Seeds! by Nancy Elizabeth Wallace, or other book on seeds
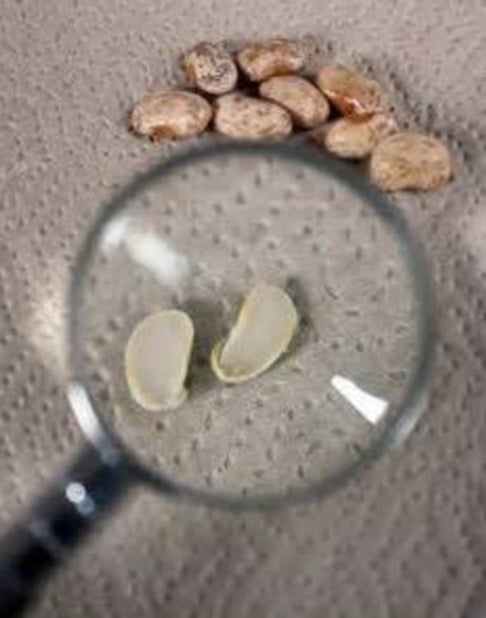
- Identify monocot & dicot seeds (bean & corn)
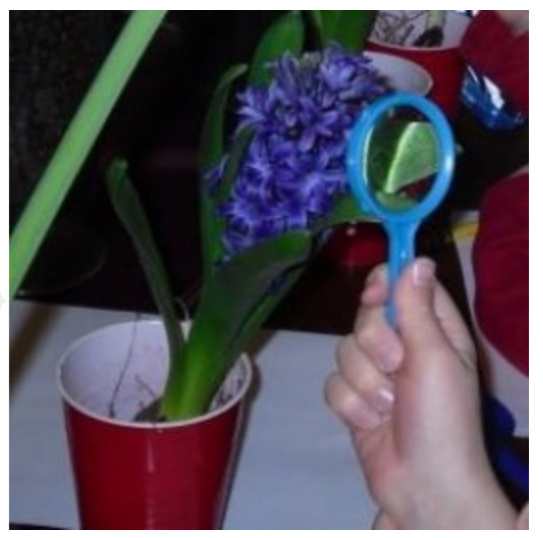
- Look at them under a magnifying glass. What do you notice?
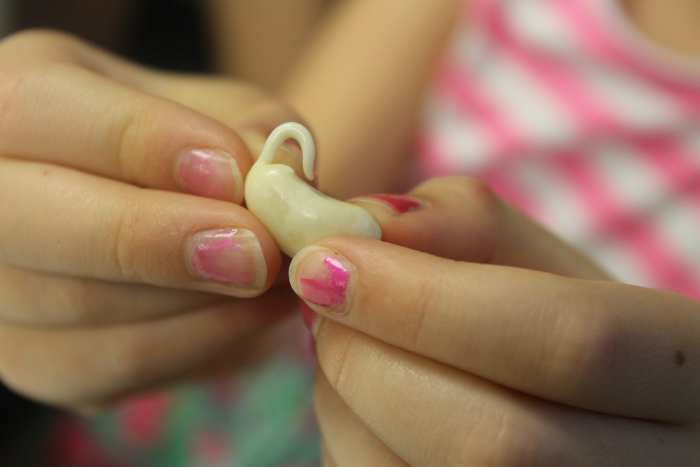
- Use your fingernail to cut them open and observe the parts.
- Seed Coat/Testa = coat that surrounds it
- Endosperm = stored food for energy (sugar)
- Radicle = root system
- Plumule = tiny shoot = stem & “leaves” but not true leaves = means feather in Latin (Just like babies aren’t born with teeth, plants aren’t “born” with true leaves.)
- Cotyledons = food absorption & storage (becomes first leaves)
- Discuss the difference between monocot & dicot seeds. (If you need an idea of what to say, read Exploring Creation with Botany by Fullbright ahead of time and reiterate that info to them as you dissect the seeds.)
- Briefly mention the difference between dicot and monocot seeds:
- Monocot seeds will not separate into two halves. Instead, the food is stored around the embryo. Monocots have one seed leaf, which is generally long and thin, like grass. Some monocot seeds are rice, wheat, corn, coconuts and grasses.
- Dicot seeds separate into two halves because they have two cotyledons. The embryos of dicot seed are large while that of monocot seeds are small. Dicot seeds contain large plumule and folded plumule leaves, whereas monocot seeds contain very small plumule and rolled plumule leaves. Hilum and micropyle of dicot seeds are clearly visible while that of monocot seeds are not visible. Some dicot seeds include beans, peas, and peanuts.
- Point out the parts of the seed: cotyledon, plumule, radicle, & seed coat.
- Allow children to sample monocot & dicot seeds such as popcorn, sunflower seeds, pumpkin seeds, and peanuts (check for allergies first).
YOU WILL NEED PER CHILD:
- a bean (we used lima beans), corn kernel (from frozen vegetables), magnifying lens, and a few seeds to try such as popcorn, pumpkin seeds, sesame seeds, and peanuts
Part 2: Collecting & Observing Seeds
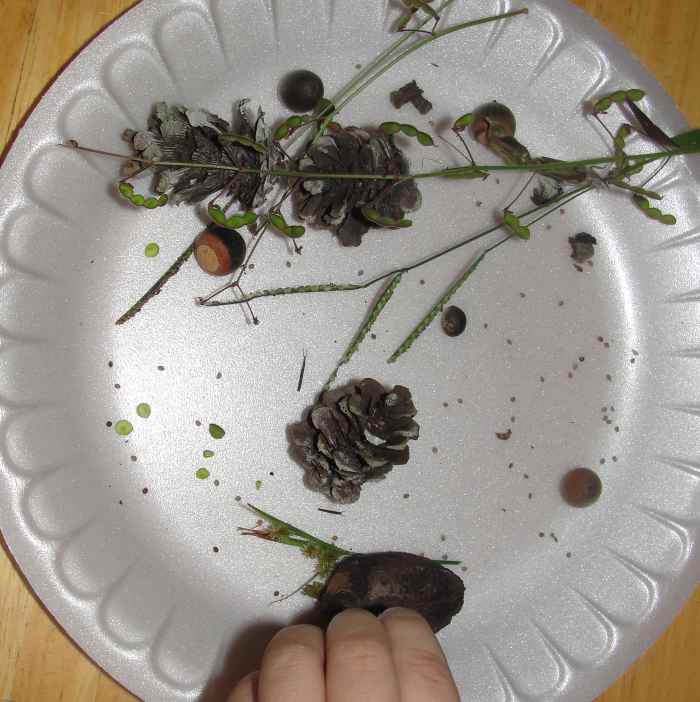
Seed Scavenger Hunt
- Collect & study seeds.
- Collect seeds. If weather permits, go outside to collect seeds. If that’s not an option, bring some from outside and from in the kitchen.
- Study the seeds. Note their shapes, sizes, textures, colors, etc.
YOU WILL NEED:
- A variety of seeds* (either outside or a box of wildflower seeds mix) and a container for the seeds (a plastic sandwich bag or disposable plate)
*TRY TO include some more usual seeds like a peach pit, avocado seed, coconut, mango seed, papaya seeds, pine tree seeds (inside a pinecone), etc.
Part 3: Germination
- Read One Bean by Anne Rockwell, which is the best book I have seen on germination! It has wonderful illustrations that keep the attention of toddlers and older children, and it provides plenty of factual information in a storybook format.
YOU WILL NEED:
- One Bean by Anne Rockwell or other book on germination
Germination Dramatization
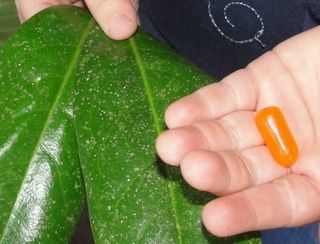
Hand each child candy. This is the endosperm (stored food for energy) that the seed will need to grow before it can begin photosynthesis. The endosperm really is sugar. Also give each child 2 leaves. These will be the cotyledons (first leaves).
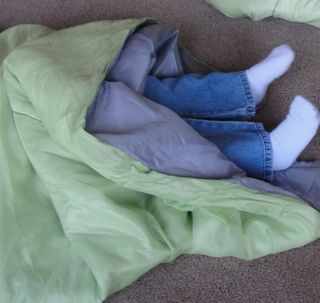
![Help the child completely crawl into a sleeping bag. This is the testa/seed coat. The child is a dormant seed. Once it gets water [pretend to pour a bottle of water over the sleeping bag], warmth, and air, it starts to grow, or germinate.](/wp-content/uploads/archived/7126478f1980b01c3285563e82f0d07d.jpg)
Help the child completely crawl into a sleeping bag. This is the testa/seed coat. The child is a dormant seed. Once it gets water [pretend to pour a bottle of water over the sleeping bag], warmth, and air, it starts to grow, or germinate.
First the testa (seed coat) splits and the radicle (embryonic root) emerges. (Have the student stick their legs out of the sleeping bag to be the radicle.) In some sorts of seeds, the seed gets its nutrients from the endosperm (stored food). The stor
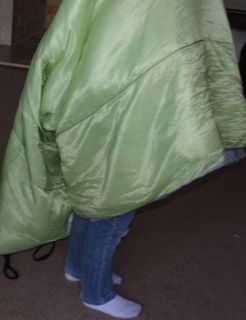
The hypocotyl (embryonic stem) and epicotyl go straight up through the dirt. (Help the child stand up. Their legs are the radicle/root, their body is the hypocotyl/stem, and their hands are the epicotyls, which are holding the cotyledons/seed leaves.

The cotyledons (seed leaves) emerge. (Have the child stick out the 2 leaves from out of the sleeping bag.)

The testa/seed coat falls off and the plant grows as the taproot shoots down and the epicotyl straightens. (Have the child stand up all the way and allow the sleeping bag to fall off from the tops of their head.)
- Act out Germination (“a seed waking up”):
(I’ve done this when we all did it at the same time and everyone had their own sleeping bag. You’ll need lots of older/adult helpers. I’ve also done this when we had each child do it individually while the class repeated the stages. The repetition really helped the students memorize the steps.)
- Hand each child candy. This is the endosperm (stored food for energy) that the seed will need to grow before it can begin photosynthesis. The endosperm really is sugar.
- Also give each child 2 leaves. These will be the cotyledons (first leaves).
- Help the child completely crawl into a sleeping bag. This is the testa/seed coat.
- The child is a dormant seed. Once it gets water [pretend to pour a bottle of water over the sleeping bag], warmth, and air, it starts to grow, or germinate.
- First the testa (seed coat) splits and the radicle (embryonic root) emerges. (Have the student stick their legs out of the sleeping bag to be the radicle.)
- In some sorts of seeds, the seed gets its nutrients from the endosperm (stored food). The stored food is mainly sugar. (Have the child eat their piece of candy.)
- The hypocotyl (embryonic stem) and epicotyl go straight up through the dirt. (Help the child stand up. Their legs are the radicle/root, their body is the hypocotyl/stem, and their hands are the epicotyls, which are holding the cotyledons/seed leaves.)
- The cotyledons (seed leaves) emerge. (Have the child stick out the 2 leaves from out of the sleeping bag.)
- The testa/seed coat falls off and the plant grows as the taproot shoots down and the epicotyl straightens. (Have the child stand up all the way and allow the sleeping bag to fall off from the tops of their head.)
YOU WILL NEED: 2 construction paper or real leaves, a sleeping bag, & a piece of candy (per child)
Part 4: Seeds for a Garden
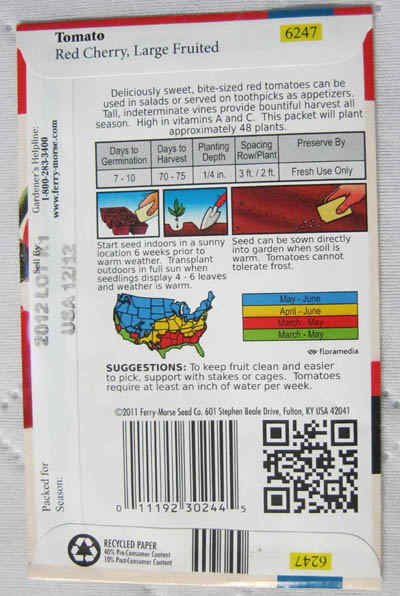
Looking at the back of a seed packet
- Read How Groundhog’s Garden Grew by Lynne Cherry, which is a cute story about various animals explaining to Groundhog what he needs to do to grow his own garden. This is a cute story with plenty of educational information sprinkled in to make it a delightful book to read. The illustrations are also beautiful..
YOU WILL NEED:
- How Groundhog’s Garden Grew by Lynne Cherry or other book on planting gardens
- Look at backs of seed packets and what the information means.
YOU WILL NEED:
- seed packets
- Talk about faith of a mustard seed (Mt. 13). Pass out mustard seeds & compare with other seeds. Plant them in soil. Talk about planting seeds & sharing God’s word (Is. 55:10-11). Guess (Hypothesize) which seed will sprout the fastest.
YOU WILL NEED:
- mustard seeds (in the spice section OR the condiment section in the more expensive mustard containers that are near ketchup – you can just put the mustard in a sieve & rinse it off) & other seeds
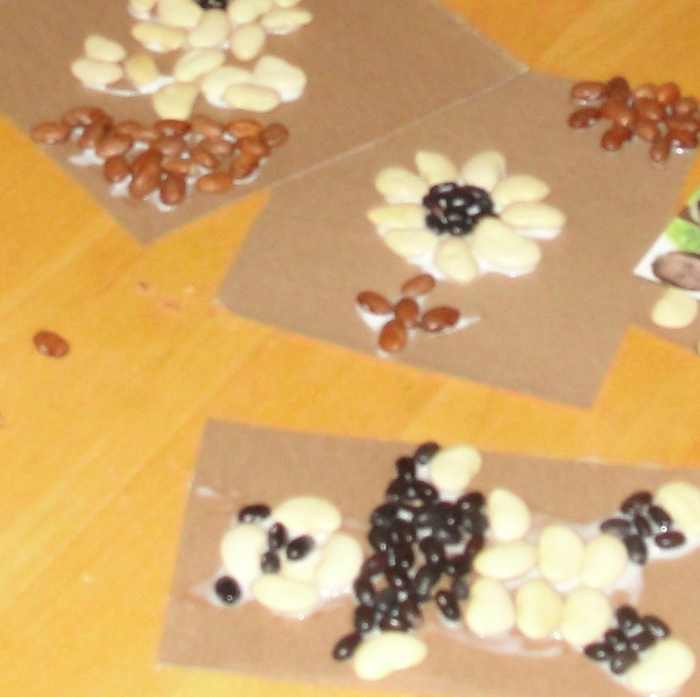
Part 5: Seed Mosaics

Making seed mosiacs
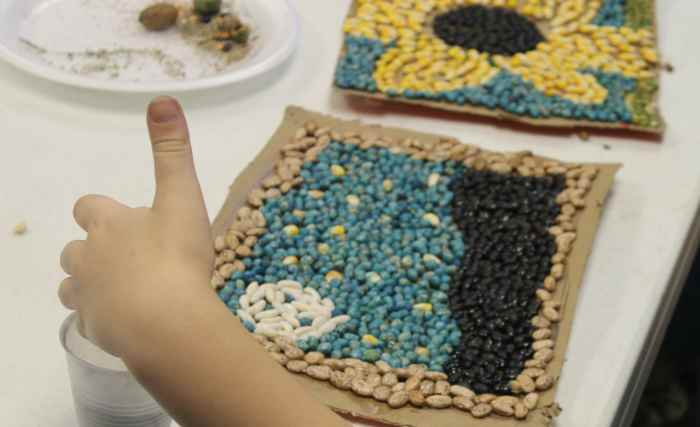
To get extra fancy, you can even dye some of the white beans using rubbing alcohol and food coloring.
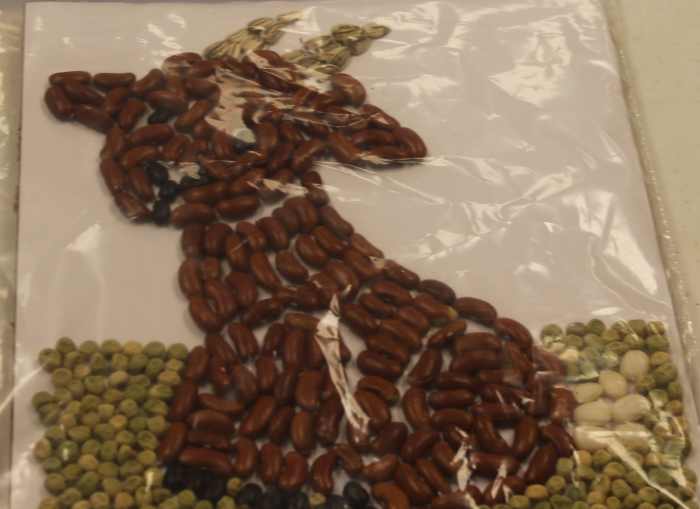
They can also paste beans over a coloring page.
- Create Seed Mosaics.
- Look at pictures of mosaics.
- Ahead of time cut out a piece of cardboard piece in a circle or other shape. Alternatively, use a paper plate.
- Allow children to draw a simple outline of picture. (Adults can draw the picture if needed.)
- While children are drawing, paper punch a hole for string or twine so you can hang it up later.
- Squeeze a generous amount of glue on your picture over the outline and inside the lines.
- Press your seeds into the glue! (It helps to start in one area instead of placing them all over the place in random areas. When it’s time to fill in the background, cover that area with glue & just sprinkle the beans, lentils, or rice over the area.)
- Let the picture dry for at least 2 hours before threading twine or yarn in the hole to hang up your seed mosaic.
YOU WILL NEED:
- dried beans (black beans, white navy beans, pinto beans), dried split peas, dried lentils, glue (tacky glue works best but liquid Elmer’s glue also works), a paper hole punch, yarn or twine, & cardstock or other heavy paper (such as a piece of cardboard from a cereal box) OR paper plates
- 5 Minute Review of what we learned
Homework: Growing a Plant
Homework: Watching seeds germinate – We used bean plants and pumpkin seeds.
- Send children home with a bag of dried beans, pumpkin seeds, or dried corn. Tell them to put them in wet paper towels in a bag or clear plastic cup. Keep the paper towels wet and tell us next week at class/co-op what you saw happen.
More of Our Favorite Children’s Books
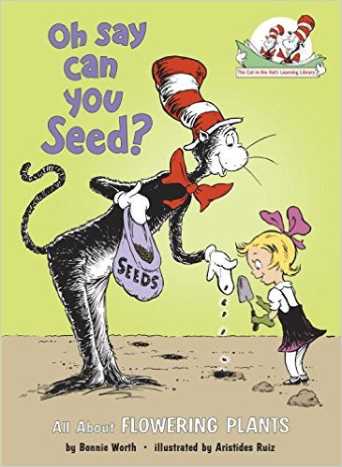


Oh Say Can You Seed?: All About Flowering Plants (Cat in the Hat’s Learning Library) by Bonnie Worth – Book images are from amazon.com.
1 / 5
- Oh Say Can You Seed?: All About Flowering Plants (Cat in the Hat’s Learning Library) by Bonnie Worth is written in the rhyming Cat-in-the-Hat manner and includes a great overview of botany!
- What Kinds of Seeds Are These? by Heidi Bee Roemer is another fun picture book on seeds that is good for young children.
- Flip, Float, Fly: Seeds on the Move by JoAnn Early Macken and
- Who Will Plant a Tree? by Jerry Pallotta are both fun picture books on seed dispersal. They are simple with nice illustrations and are ideal for preschool and early elementary-aged children!
- A Seed Is Sleepy by Dianna Aston has gorgeous illustrations and includes lots of fun tidbits about various seeds.
Our Favorite Videos
How Does A Seed Become a Plant?
Time lapsed Germination of a Seeds
Seed Dispersal
Seed Dispersal by Explosion
Ready for the next lesson?
Observing parts of a flower from and activity found in Part 2: Flowers Lesson
Go on a seed hunt, act out germination, create seed mosaics, make and eat a plant parts salad, dissect a flower, decorate sunflower cookies, compete in a photosynthesis relay race, got on a plant scavenger hunt, and more during this fun four part unit study on Botany and Plants!
- Seeds Lesson – This is part 1 of a 5 part unit study on Botany and Plants. Go on a seed hunt, act out germination, create seed mosaics, make and eat a plant parts salad, and more in this fun lesson on plants!
- Flowers Lesson – Go on a flower hunt, dissect a flower, create edible flowers, paint flowers, and more in this fun lesson on flowers! This is part 2 of a 5 part unit study on Botany and Plants.
- Bee & Honey Lesson – This is part 3 of a 5 part unit study on Botany and Plants. (This lesson is optional if you need to squeeze this unit into 4 parts rather than 5.) Dance like a bee, make edible bees using honey balls, use cheese puff balls and and juice boxes to dramatize pollination, create pipe cleaner bees and have them fly to the tune of Flight of the Bumblebee, and more!
- Roots & Stems Lesson – This is part 4 of a 5 part unit study on Botany and Plants. Observe roots and stems, observe transpiration in action and dramatize it, create a plants part salad, and more in this fun, hands-on lesson on roots and stems and transpiration!
- Trees & Leaves Lesson – This is part 5 of a 5 part unit study on Botany and Plants. Play a photosynthesis relay race, create an edible leaf structure, act out the parts of a tree, examine and classify tree leaves and use them to identify trees, and more in this fun, hands-on lesson on leaves and trees!
- Botany Scavenger Hunt & Field Trip Ideas – This is the culminating activity we did after a 5 week hands-on unit study on botany/plants. Children went on a fun-filled scavenger hunt for a variety of plants, and afterward had a plant-themed picnic lunch. Also included are the field trips we went on while studying this unit on botany and plants.
- All of my Fun, FREE Hands-on Science Unit Studies & Lessons – Fun, free hands-on Science unit studies and lessons – Learning through Doing: Experiments, Cooking, Dramatizations, Edible Projects, Games, Crafts – Astronomy, Geology, Biology, Plants, Genetics, CSI, Human Anatomy, Simple Machines, Electricity, Earth Science, Fossils, Weather, Five Senses, & Ecology
- All of My Fun, FREE Hands-on Unit Studies – Over the years I have posted over 30 science and social-studies based unit studies, compromised of more than 140 lessons. For each lesson I have included activities (with photos), our favorite books and YouTube video clips, lapbook links, and other resources.
KONOS Curriculum
Konos Volume I
Would you like to teach this way every day?
I use KONOS Curriculum as a springboard from which to plan my lessons. It’s a wonderful Christian curriculum and was created by moms with active children!
© 2011 Shannon
Comments, Questions, or Ideas? – Let me know you dropped by! Was this lens helpful? Do you have any questions, comments, or additional ideas? Please post here!
Shannon (author) from Florida on December 07, 2015:
Thank you so much for the sweet comment! If you’re ever in North Florida, let me know! 🙂
JefflovesDebbyWuttke on October 27, 2015:
I just want to thank you so much for creating and sharing these lesson plans. I’m sure they are quite a lot of work to put together. I don’t know how you do it.
I was thinking to myself as I read this post that it sure would be nice to meet you sometime! Your creativity would be contagious I’m sure. It’s apparent you have a love for teaching.
Gods blessings, Deborah
Shannon (author) from Florida on July 31, 2012:
@JoyfulPamela2: Thank you!
JoyfulPamela2 from Pennsylvania, USA on July 31, 2012:
Love these fun ideas!
julieannbrady on March 11, 2012:
Very creative … love this part of the lesson plan: * Please bring one sleeping bag per child.*
Maritimer LM on February 13, 2012:
I read the Little Farm by the Sea by Kay Chorao to my grandson. He loved it!
Peggy Hazelwood from Desert Southwest, U.S.A. on July 21, 2011:
I love your seed mosaic picture. So cool! I remember we made a mosaic in 4H shaped like our state. Linking this to my Plant Worksheets lens! Thanks for the good information.
lasertek lm on May 16, 2011:
wow! great looking lens! kudos!
HeatherTodd1 on May 13, 2011:
Thanks for the Great article!
Jeanette from Australia on May 02, 2011:
What lovely ideas. I love the hands-on learning style.
blessedmomto7 on April 21, 2011:
Great info and love your ideas!
Leave a Reply