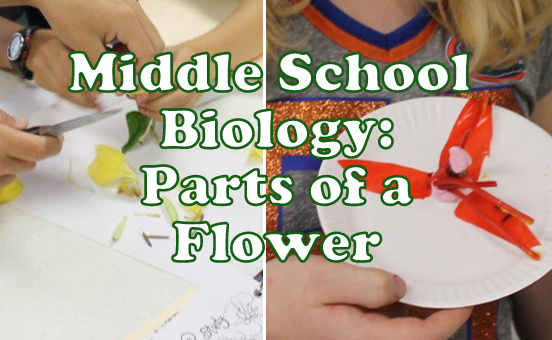
Hands-on Middle School Biology Lesson on Parts of a Flower
This is the 2nd lesson in a series of 32 hands-on lessons covering middle school biology. This lesson covers the parts of a flower. I used this plan while teaching a 55 minute middle school biology class. Each lesson plan includes homework assignments and a variety of hands-on activities to make each lesson engaging & memorable. Use these fun lessons with your classroom, homeschool, after-school program, or co-op!
These lessons are written for a class that meets once a week. If your class meets 5 days a week, simply do this lesson one day a week and use the homework assignments (at the bottom of the page) for the work for the other days of the week.
Pop Quiz: The Parts of a Flower & Homework
Pop Quiz: How many parts of a flower can you name?
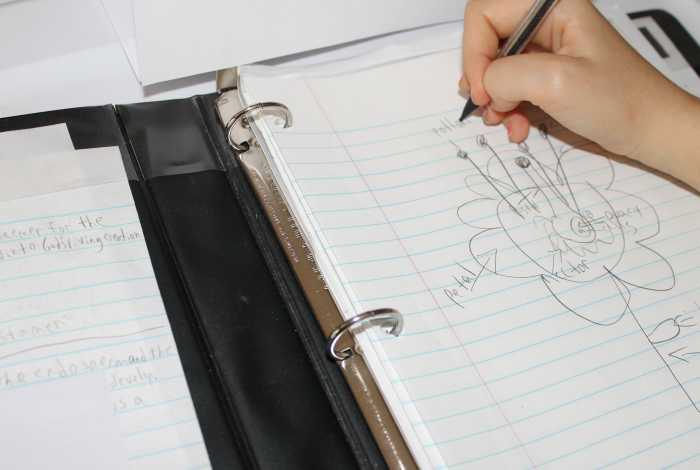
- Give the students 2 minutes to sketch & label a flower and its parts. They may not use their notes or textbooks. After 2 minutes, ask who has labeled: 3 parts? 5 parts? Keep going up until you have the top 3 students who labeled the most parts. Give them each a ticket (and a starburst candy – optional).
You will need:
- Optional: 3 Starburst candies
- Give tickets to children who completed their homework. Go over the homework questions and pass out tickets to students who answer the questions. Have them each show the flowers they drew & identified.
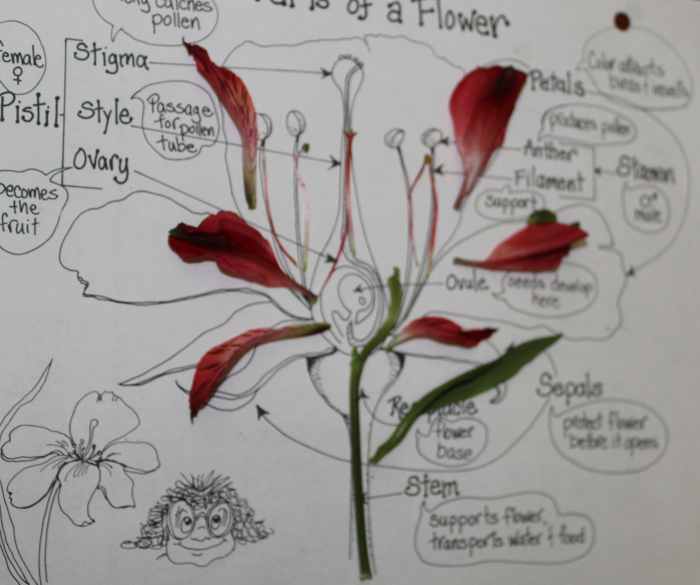
Parts of a Flower & Their Functions
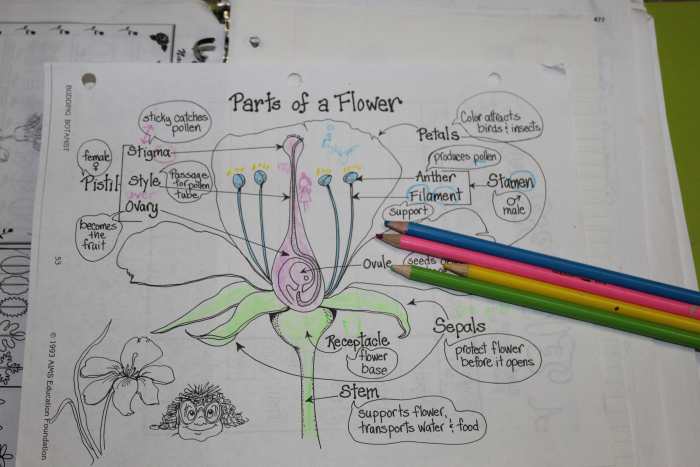
Flower Parts & Their Functions Worksheet from “The Budding Botanist.”
- Pass out a worksheet showing the parts of a flower & their functions. Go through the parts with mnemonics.
- The male parts are men. The whole part that stays there is the stamen. The “stalk” that “fills” the bottom part is a filament. What is on a male deer’s head? Antlers. The “head” of male flower stamens have anthers, with pollen on top.
- The lady part has a L for lady. The whole part is the pistil. (Notice it’s spelled differently than a gun, pistol.) At the top is the mama. It’s the stigma. She’s a stylish mama. The tube is called a style. Down at the bottom is where you have the egg, called an ovule, surrounded by an ovary, which is “over” the egg.
Have students use colored pencils to draw and color these parts as you discuss each one:
- Color the stamen blue.
- Circle men in stamen with blue.
- Circle fil and men with blue.
- Use blue to draw antlers over the anthers and then draw “Paul” (for pollen) sitting on the antlers.
- Color the pistil pink. If desired, draw a pink “pistol” next to it. Circle the L at the end of pistil.
- Circle the ma in stigma with pink.
- Use pink to draw a “stylish” stick figure mama next to the style.
- Use pink to write “over” over ovary.
- Color the sepals green. Write “see pull” over the word. “See, it protects the bud and then pulls open when the flower is ready to bloom.”
- Color the receptacle green and draw a “container” next to it.
- Color the stem green.
Joke: What did the male stamen say to the female pistil?
I like your “style.”
Dissecting Flowers
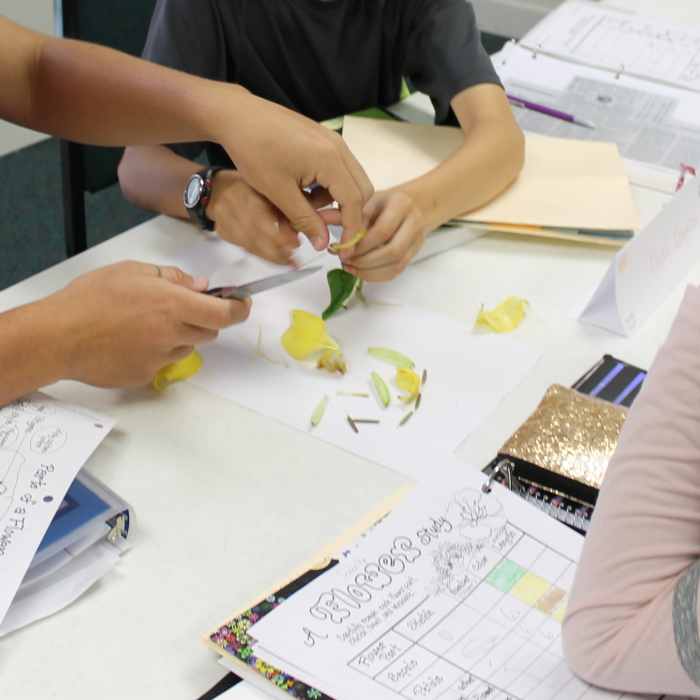
Dissecting a lily
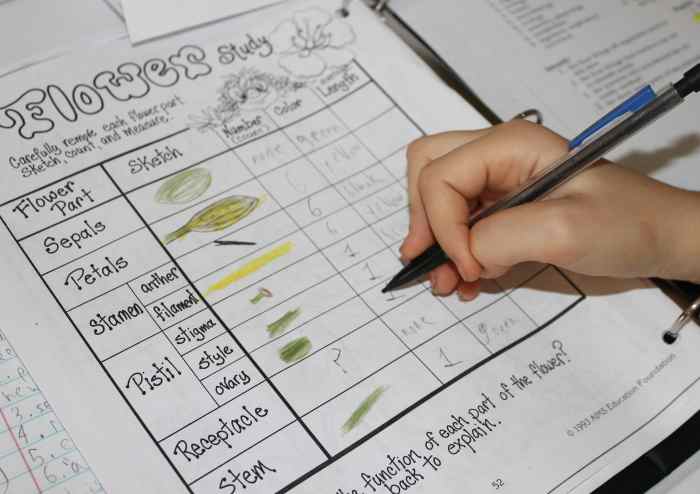
Data sheet for lily dissection is from “The Budding Botanist” (Yes, I do see the error on receptacle.)
If desired, students can line up their flower parts on their worksheet.
- Dissect flowers.
- Divide the class into groups of 3-5. Give each group a plate or white paper and a lily or other complete flower. (I also included an unopened bud, which they enjoyed opening to find the unattached pistil and stamens.)
- Have them sketch and count the sepals, petals, stamens (with the anthers & filaments), pistil (with the stigma, style, & ovary), receptacle, & stem.
- They will need a sharp knife or scalpel to cut into the ovary
- If they find a sticky substance toward the bottom, ask them what they think it might be. It’s nectar! I told them to feel it and smell it. Some of the children tasted it.
You will need for each group of 3-5:
- a flower (such as a lily)
- an unopened bud (optional)
- a white paper or plate
- a knife or scalpel
- worksheet for recording data (optional)
Edible Flower Models
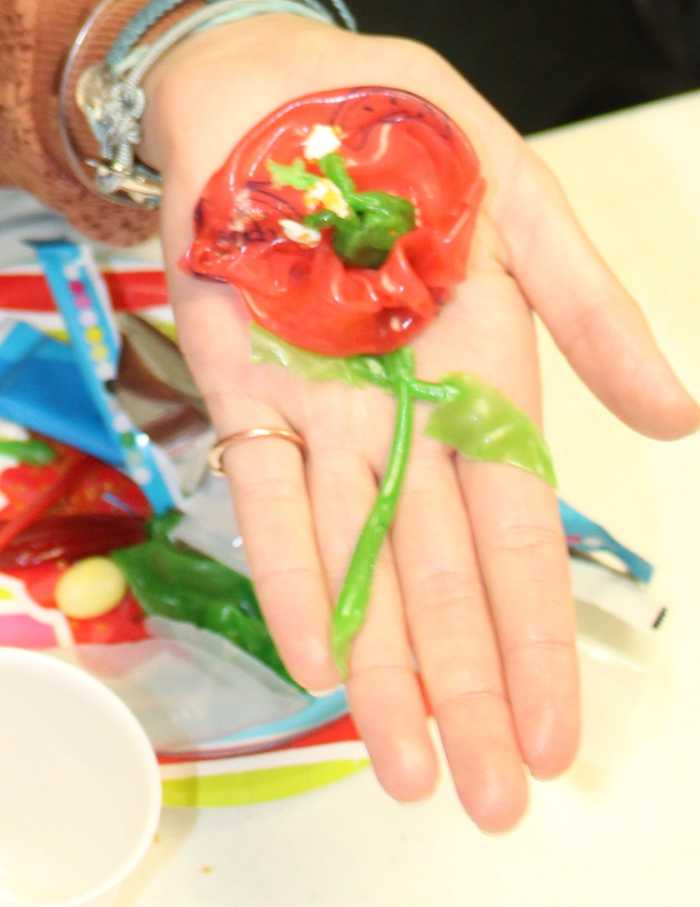
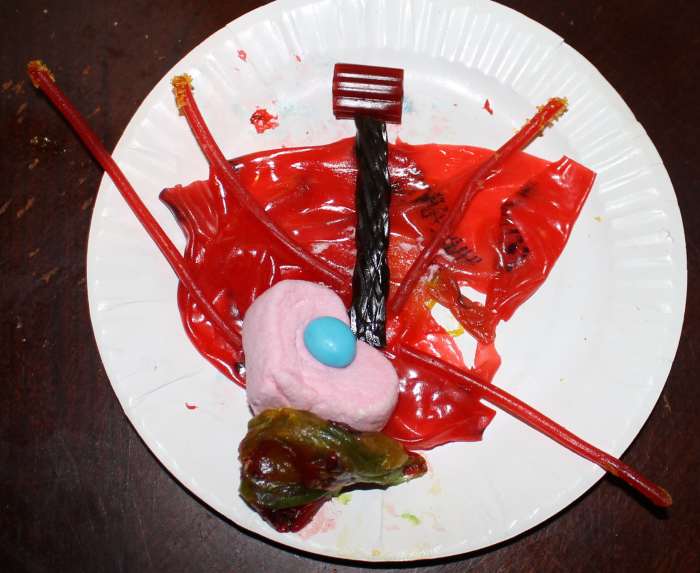

- Allow students to each make an edible model of a flower. I handed them the ingredients on plates, listed the parts they needed to include, & let them figure out how to do it. Here’s one way to do it:
- Petals – fruit roll-up
- Filaments – licorice pulls (a single strand cut into 1/3)
- Anther – 1/4 of a mini-marshmallow
- Pollen – yellow cake/cookie sugar or sprinkles (Offer small cups of water. If they dip the licorice strand in the water & then dip it in the sugar, it will stick.)
- Pistil – full-size licorice
- Stigma – bite-size licorice
- Ovary – marshmallow
- Ovule – jelly bean
- Sepal & receptacle – green fruit roll-up or Laffy Taffy (optional)
You will need per student:
- small plate
- candy: fruit roll-up, 3-6 strands of licorice pulls cut in 1/3, yellow cake/cookie sugar or sprinkles (& a small cup of water which can be shared), 1/3 a piece of a full-size licorice, bite-size licorice, 2-4 small marshmallows, jelly bean, & green fruit roll-up or Laffy Taffy (optional)
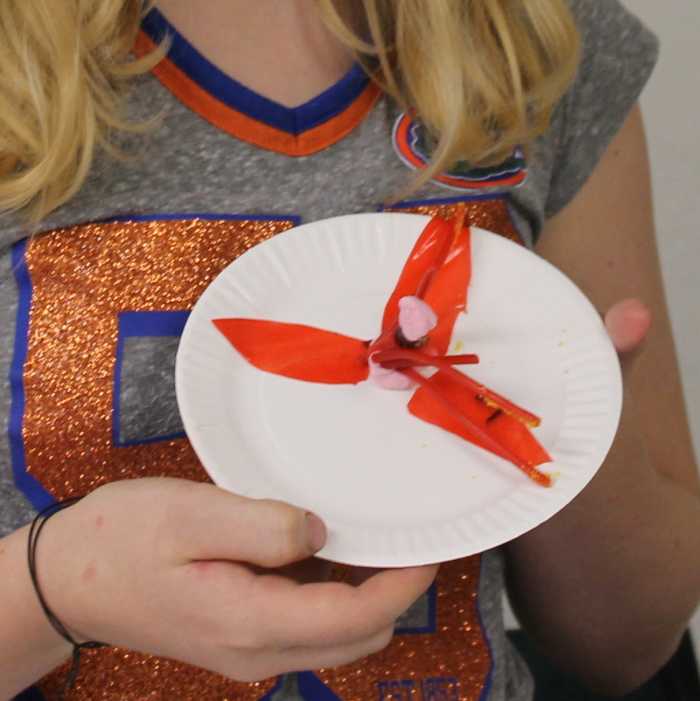
- Have the students partner up with someone next to them and go through each part on their flower. While they do this, take a photo of each student with their flower. Then allow them to eat it or save it.
Homework
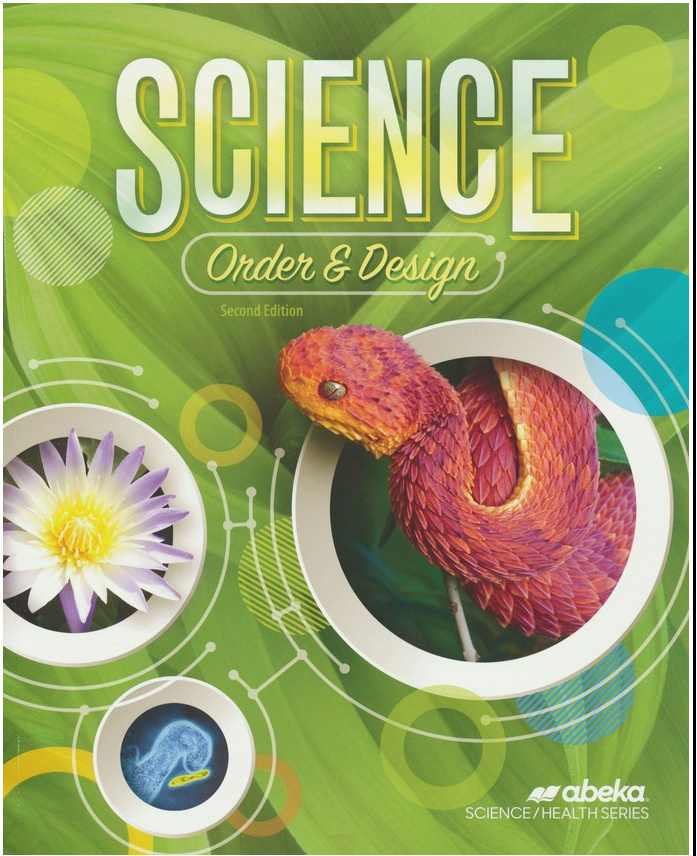
A Beka: Order & Design
(Page numbers refer to the pages in A Beka’s Science: Order & Design.)
- Friday: Flowers: Read pp. 46-53 & answer 3 questions of your choice on p. 53.
- Monday: Find a live flower outside. Draw a detailed picture of it & identify it using its traits.
- Tuesday: Monocots: Read pp. 53-59 & answer 4 questions of your choice on p. 59.
- Wednesday: Pull a stalk of grass including the roots. Mount it to a sheet of paper by taping it. Label the parts, using the diagram on p. 57 as an example.
Homework Example
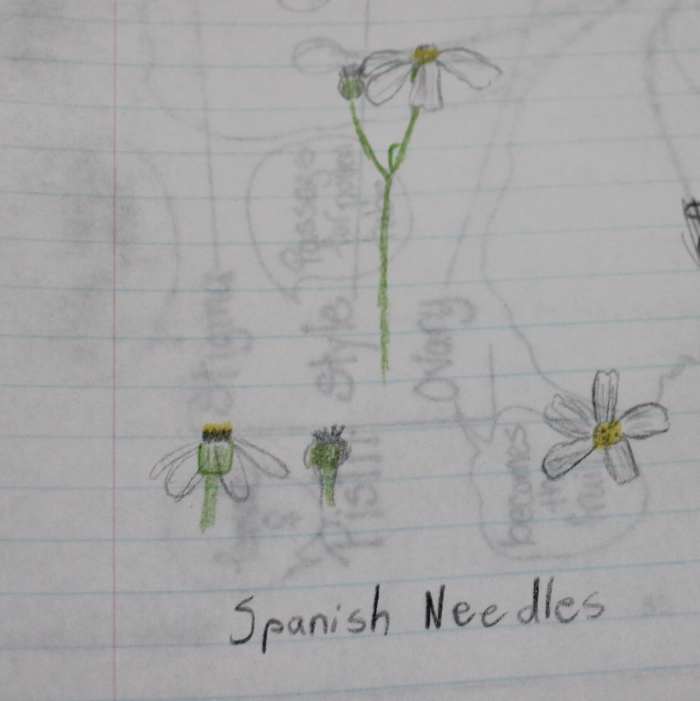
Monday’s homework: Draw & identify a flower from outside.
Looking for all my lessons?
- First Day of Class & Plant Identifications
- Parts of a Flower
- Amazing Plants (Horticulturist Guest Speaker)
- Seeds and Flower Families
- Photosynthesis and Plant Parts
- Cardiovascular, Respiratory, & Digestive Systems
- Skeletal, Muscular, & Integumentary Systems
- Endocrine & Nervous Systems and Healthy Living
- Human Baby Fetal Development (Pregnancy Care Center Guest Speaker)
- Creation and Science
- Creation, Evolution, & the Eyes of Faith
- Classifying Plants & Animals
- Amazing Mammals
- Mammal Dissection
- Semester Review & Winter Party
- Bird Anatomy
- Bird Features
- Bird Watching (Birding Guide Guest Speaker)
- Fish Anatomy and Dissection
- Invertebrates Anatomy and Dissections
- Frog Dissection
- Reptiles Show and Tell
- Insect Anatomy
- Singing & Social Insects
- Beneficial Insects (Entomology Guest Speaker)
- Arthropods (Crayfish & Grasshopper) Anatomy and Dissections
- Crustaceans & Arachnids
- Cells, Algae, and Fungi
- Protozoa and Bacteria
- Trees
- Ecology
- Semester Review & End of Year Party
- My Middle School American History Lessons
- All of My Hands-on Lessons & Unit Studies
© 2018 Shannon
Comments
Shannon (author) from Florida on September 01, 2018:
I’m glad it brings back memories. Hopefully they are good ones!
Liz Westwood from UK on September 01, 2018:
This takes me back to one of my first biology lessons at secondary school.
Leave a Reply