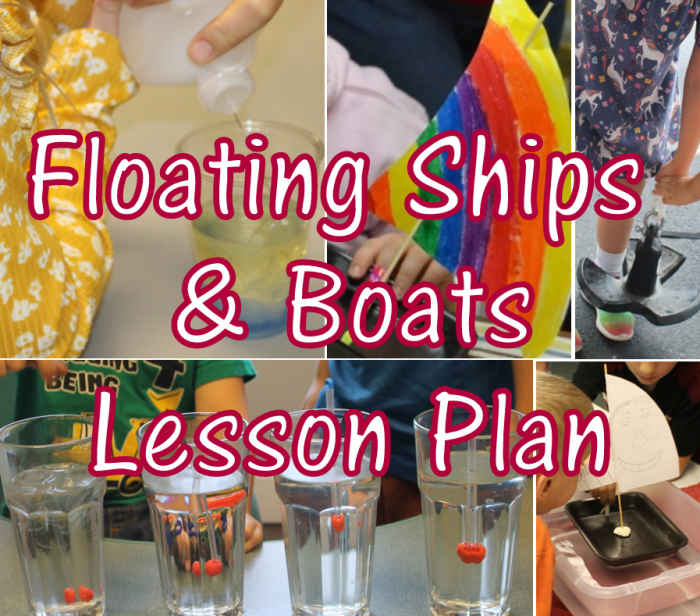
Floating Ships and Boats Hands-on STEM Lesson Plan
This is part 2 of a 5 part hands-on unit study on Floating & Flying (Fluid Mechanics). This week’s focus is ships and boats. Create working models of sailboats, submarines, and hovercrafts, test out jet power, examine the impact of density of liquids and surface tension on floating, and more! My lessons are geared toward 4th-5th grade level children and their siblings. These are lessons I created to do with a weekly homeschool co-op. We meet each week for 2 1/2 hours and have 33 children between the ages of 1-13. Use these fun lessons with your classroom, family, after school program, camp, or co-op!
Devotional: What Does Your Tongue and a Rudder Have in Common?
- Pray. Read & discuss James 3:3-9. Say something such as:
- What part of the body was this passage from the Bible about? (tongue)
- In this passage, when they talk about our tongues, they really mean the words that we speak. What can we do with our tongues? (bless and curse)
- What did it compare our tongues to? (bridle on horse, rudder on ship, spark, fire)
- Is our tongue a small part of my body? (Yes) Is it a powerful part of my body? (Yes)
- Can we control our tongues, or what we say, or do our tongues, or what we say, control us? (Our tongues control us.)
- We’re going to learn about ships today. From small speedboats to big boats, many of them have a small handle that moves the rudder. The rudder is small in comparison to the entire size of the ship, but if you turn the rudder one way, your entire boat or ship will turn to the left. If you turn the small rudder the other way, your entire boat or ship will turn to the right.
- Can we control our tongues? (No) According to the passage, we can’t.
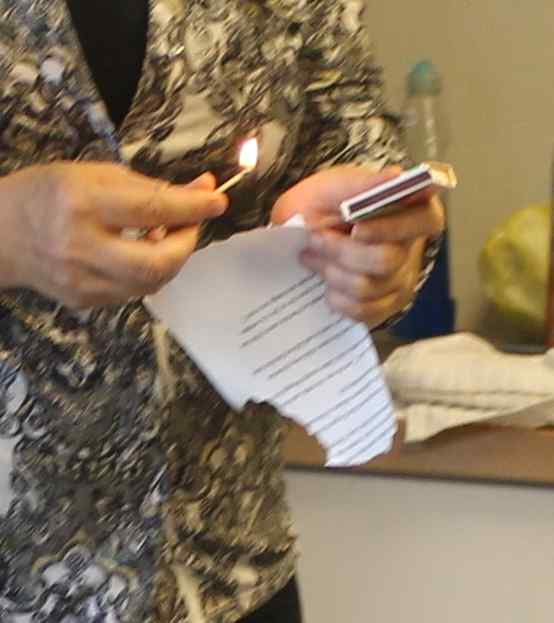
- It’s like this fire. [Set a small piece of paper on fire and let it burn up the paper.] I can’t control this fire, and I can’t control my tongue. What did the fire do to the paper? (It destroyed it.) When we use our words to tear others down, we do the same thing to them that the fire did to the paper.
- What can be done about this? [Take out a second sheet of paper that has had half of it soaked in water, and set the part on fire that wasn’t soaked in water on fire.] Just like the water on this paper will stop the fire from burning it up, God can give us the power we need to stop our tongues from saying words that hurt others and tear them down. (If desired compare this to being baptized and receiving the Holy Spirit.) Instead, He can help us to use our tongues for good, for blessing and encouraging others.
YOU WILL NEED: 2 small pieces of paper, matches or lighter, a small bowl of water, & tongs (optional)
Density of Liquids
Density of liquids
- Review what we learned last week about the definition of buoyancy and what makes ships float or sink.
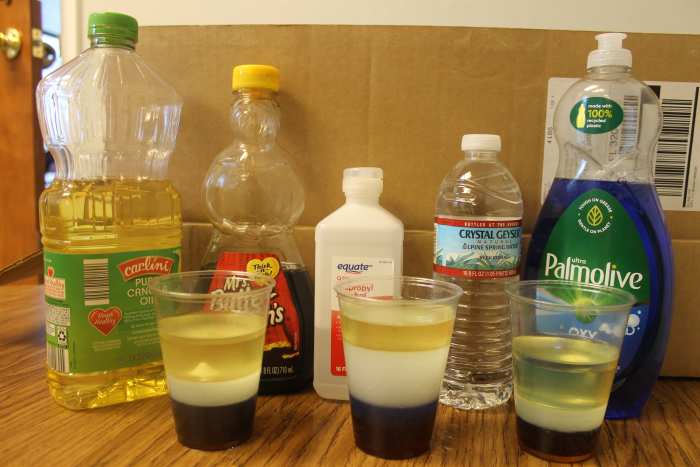
- Density of liquids: Ask children to remind you of what density is. Some liquids are less dense than water, so they float on top of water. Other liquids are denser than water, so water floats on top of them.
- Divide children into groups of 3-5. Give each group a clear cup. Let one child pour about 1/4 cup of water into the cup. Tell the children the liquid in the cup is water.
- Pass around a bottle of cooking oil and have a child in each group pour about a 1/2 inch layer of oil over the water. After everyone has done this, ask them if cooking oil is more or less dense than water.
- Hypothesize: Is cooking oil more or less dense than water? Will it sink or float? Allow a child in each group to pour about a 1/2 inch layer of oil over the water. Was your hypothesis correct? (The oil is less dense, so it floats.)
- Hypothesize: Is pancake syrup more or less dense than water? Will it sink or float? Allow a child to pour about a 3/4 inch layer of syrup over the cooking oil. Was your hypothesis correct? (The syrup is more dense, so it sinks.)
- Hypothesize: Is dishwashing soap more or less dense than water? Will it sink or float? Allow a child to pour about a 1/2 inch layer of dishwashing liquid over the cooking oil. Was your hypothesis correct? (The soap is more dense than water, so it sinks below the water. It’s less dense than the syrup, so it floats above the syrup.)
- Hypothesize: Is rubbing alcohol more or less dense than water? Will it sink or float? Allow a child to pour about a 1/2 inch layer of rubbing alcohol over the cooking oil. Was your hypothesis correct? (The rubbing alcohol is least dense, so it floats above the other liquids.)
- Which liquid is the densest? (The syrup) Where is it? (the bottom) Which liquid is the least dense? (The rubbing alcohol) Where is it? (the top)
YOU WILL NEED: a large clear disposable cup per group, container of water, dish washing liquid, pancake syrup, cooking oil, rubbing alcohol
Hydrometers
Hydrometers
- (Prep: Fill 1 glass with very cold, icy water. Write “F” next to it. Fill 1 glass with hot water. Write “T” next to it. Fill one glass with VERY salty water that is hot. Write an “S” next to it. Fill 1 glass with VERY salty water and add ice cubes. Write a “W” next to it. Wrap kitchen towels or coozies around glasses to help insulate them.)
- We have seen that different liquids have different densities. The denser or “heavier” the liquid, the better is it at making things float in it. Density and the temperature of the water play a role in floating.
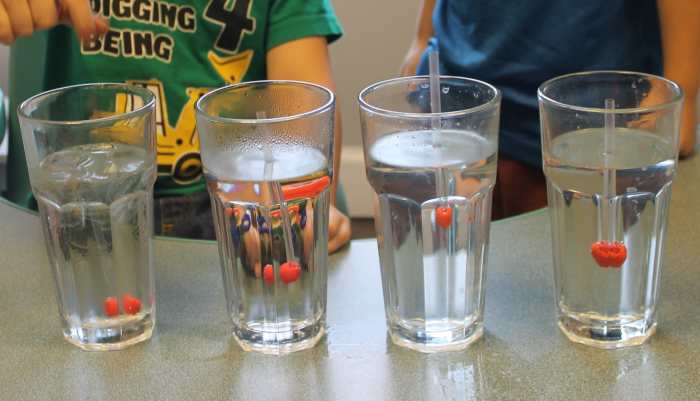
- Attach a ball of clay to the bottom of a straw. Tell them that this straw is a hydrometer. A hydrometer can be used to determine the density of water. Hydrometers were invented by Leonardo da Vinci, who was a scientist, inventor, and artist. He painted the Mona Lisa and The Last Supper.
- Allow 4 volunteers to each create a hydrometer by placing a ball of clay to the bottom of a straw. Make sure the balls of clay are the same size.
- Have the children guess what it is inside each glass. One has cold fresh water, one has warm fresh water, one has cold salty water, and one has warm salty water like what you’d find in the ocean.
- Ask them to make a hypothesis: Will their hydrometers all float at the same levels in each of the cups of water? If not, which cup will it float the highest in? Which cup will it sink the lowest in?
- Have the children place the hydrometers into the liquids and compare the different levels at which the hydrometers float. Ask the children to tell you what they observe.
- The particles of dense liquids are bigger or closer together. Dense liquids push harder on the hydrometer. The harder the push, the higher up in the liquid the hydrometer floats. Like air, water expands as it gets warmer and as a result becomes less dense. Water is most dense at temperatures near freezing. When water freezes, however, it expands, becoming less dense. If equal volumes of cold water and hot water are compared, cold water weighs more than hot water. Ocean water has salt, a type of “stuff,” dissolved in the water. With more stuff in it, ocean water is denser than fresh water. Put another way, a gallon of salt water weighs more than a gallon of fresh water. Because of this weight difference, when an object floats in salt water, a smaller volume of water needs to be displaced than would be needed if the water contained no salt. Because less salt water needs to be displaced, an object floats higher in the salt water.
YOU WILL NEED: 4 glasses (all the same size), salt, spoon, ice, water, 5 straws, & 5 pea-sized balls of clay (all the same size)
Plimsoll Lines

Plimsoll Line
- Ask children, “Using what you just learned about the density of salt water and fresh water and hot and cold water, how might that affect how much cargo you would place on a ship? Would that affect how much cargo you would load on a barge that starts out in the fresh water of the Mississippi River but is sailing out to the salt water of the Gulf of Mexico? What about a ship that is sailing from the warm waters of Miami up to the cold waters of Canada?”
- Show children a picture of Plimsoll lines that are painted on the hulls of ships. Have them say, “Plimsoll lines.”
- Ask them what they think they might be or mean. Do they recognize the letters from the activity we just did?
- Plimsoll lines indicate how fully ships can be safely loaded under a variety of water and climate conditions. These markings came about over a hundred years ago, at a time when England was enjoying the fruits of the Industrial Revolution. Manufactured goods were being produced and exported as never before, and unfortunately, it was not uncommon for greedy ship owners to both overload and heavily insure their boats before launching them on their trade routes. As a result, a great many ships sank in the ocean and were lost; in one year alone 411 ships were wrecked along England’s coast, and over 500 sailors drowned. Not surprisingly, sailors in the Merchant Navy grew reluctant to work on what they considered dangerous ships. Many were more willing to spend twelve weeks in prison for disobeying orders than they were to set sail on such vessels. At one time a prison inspector in southwest England found that nine out of twelve inmates were sailors who had been jailed for desertion. Samuel Plimsoll, a Member of Parliament, became concerned about what he called the “coffin ships” of the times, and fought for several years for safety regulations. In 1876 Parliament pass a law requiring all ships to have load lines painted on the sides of ships. The overloading of ships was not as common in the U.S., and it wasn’t until 1929 that Congress passed the Load Line Act here. Since then, the practice of applying load markings has become worldwide.
- The Plimsoll line is also called a water line or international load line.
- The basic load line symbol consists of a circle with a horizontal line passing through the center. The letters on either side of the circle indicate the organization that certified the load level. In the example above, the A and B stand for the American Bureau of Shipping. The placement of the line depends on a lot of factors, including various aspects of the hull shape, the length of the boat, and the type of cargo.
- The additional lines to the right of the circular symbol show the limits for different water types and climates, reflecting the density differences present at the time of loading.
T=Tropical Fresh Water
F=Fresh Water
S=Salt Water in Summer
W=Salt Water in Winter
YOU WILL NEED: picture of Plimsoll lines
Sailboat Models & Rudders


- You may have noticed that ships and large boats have steering wheels. Smaller boats might just have a tiller instead. Both wheel and tiller are used to control a rudder. The rudder is used to steer the boat.
- At sea, sailors say “port” for left and “starboard” for right. Ask, “What do they say for right? What do they say for left?” Most of you are right-handed, aren’t you? Most sailors were as well, so their right arms were more powerful for rowing a boat. They’d steer on the right side. Steer somehow turned into “star.” Maybe it was the sailor’s accent. They’d dock the ship on the other side, the left side, which is where the port was, so the left side of the boat or ship is called the “port.”
- We’re going to make a boat with a rudder that you can control. Explain how the rudder works: If the rudder points in line with the flow of water, the boat moves straight on. If the rudder points to the left or right, the flow of water is slowed by it and so the boat changes direction.
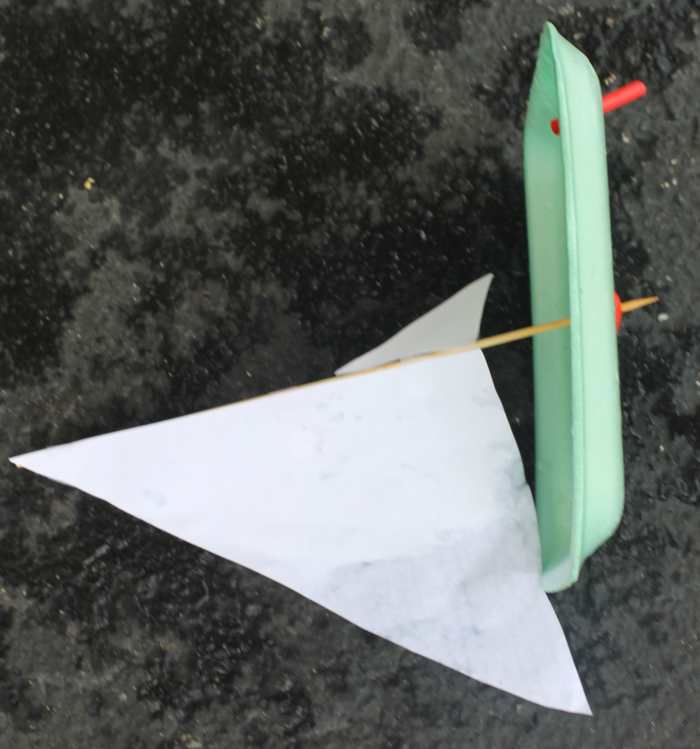
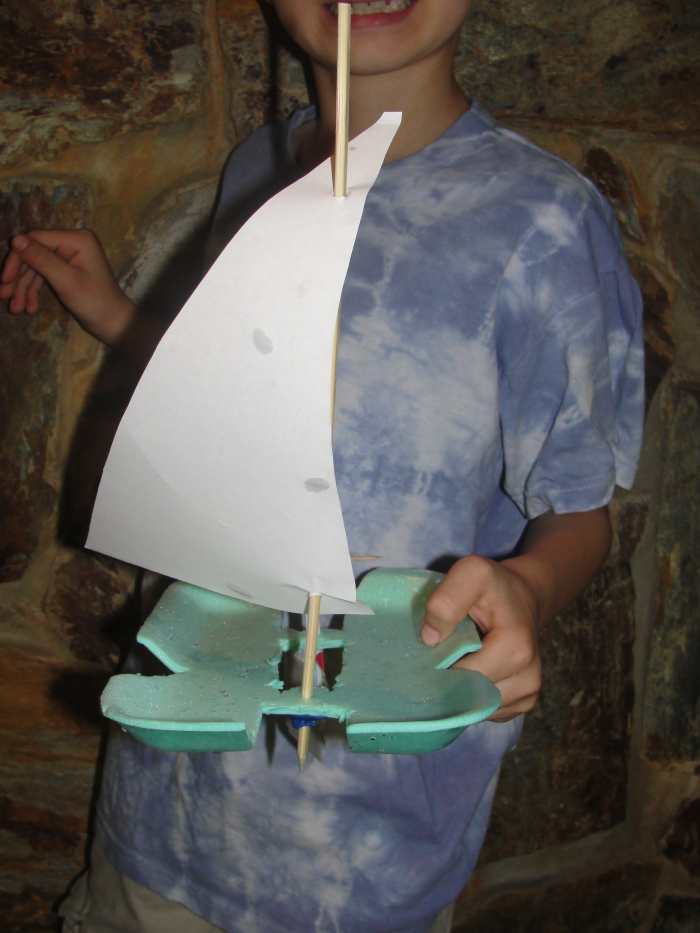
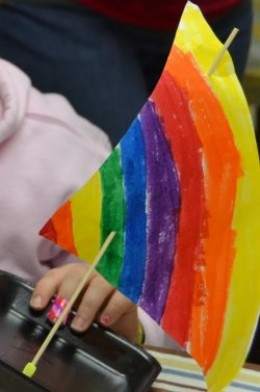
- Have children get their Styrofoam tray, scissors, paper, square of plastic, and markers. They can cut out a boat shape from the Styrofoam tray. Tell them the trays will be the main part of their boat, which is called a hull.
- Tell them that sailboats usually have 2 sails. The big sail is the mainsail. The small sail is the jib. Both sails are attached to the mast using rope. (Have them repeat the words mainsail, jib, and mast after you say those words.) Show the shape of a right angle, & tell them that right triangles tend to be the favored design for sails.
- Let them cut out a triangle-shaped sail out of the sheet of paper. Give the children a couple minutes to decorate their sails using markers. They can make 1 or 2 sails. (*If your children would like for their sails to be a bit more permanent, they can instead make them out of duct tape or cover their paper sails with clear packaging tape.)
-While children color their sails, do the following:
- Give each child a shish kabob skewer and have them push the skewer through the sail towards the bottom and top. If they made a mainsail and a jib, have them put the mainsail on first, pull the bottom part of the sail off the stick, thread the jib on, and then put the bottom part of the mainsail back on. (Alternatively, they can tape on the sails.)
- Have them use the skewer to push a hole into the bottom of the Styrofoam hull towards the front of the ship. This will be the mast.
- Pass out small balls of clay and have the children place a small piece of clay on the bottom of the skewer (under the Styrofoam) so that it will stay.
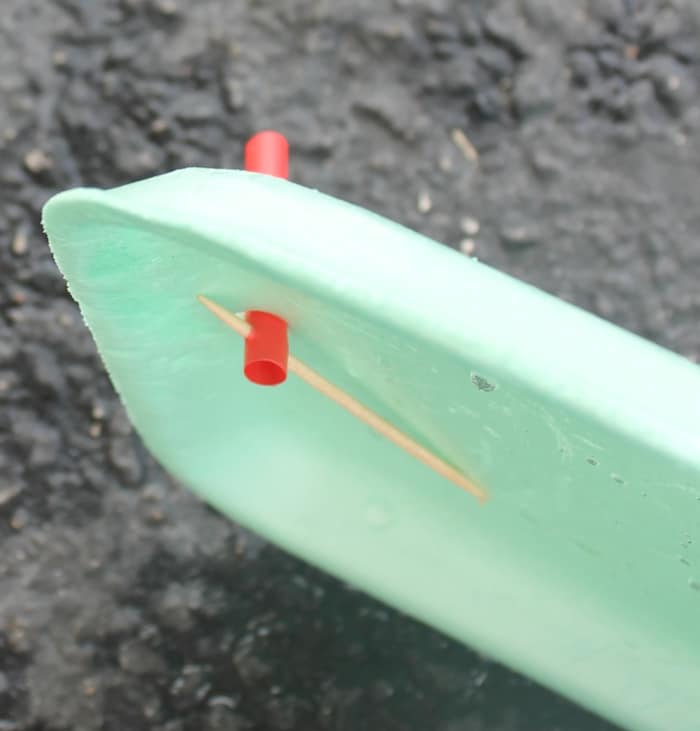
- Have the children tape their rudder (a square cut from an OJ/milk container) to a drinking straw.
- Have the children use the straw to push a hole in the hull towards the back of the boat.
- Pass out a toothpick to each child and have them use the sharp side to push through the straw above the boat level. This will be the tiller.
- As children finish their sailboats, let them go outside to launch their boats into buckets of water. They can blow into their sails and steer by turning the rudder. Remind them that “port” means left and “starboard” means right. After the children have had a chance to sail their boats, ask them if they can adjust their rudders so that their boats sail around in a circle when they blow on their sails.
- Have them remove their sailboats from the water and come back inside.
NEED PER STUDENT: wood shish-kabob skewers, toothpick, waterproof tape like duct tape (optional), 1/4 of a piece of a straw, Styrofoam tray or the lid of an egg cartons, scissors, markers, paper, rudder (made from a 1x1inch square of OJ or milk carton), 2 pea-sized balls of clay, & container of water
- If desired, have children watch the below video while waiting to sail their boats.
The physics of sailing
Catamarans
- If not limited by time, allow children to observe a catamaran and try to figure out how to transform their sailboat into a catamaran.
- Ask children to name different types of boats. Ask them if they remember the name for the part of the boat that in which you sit. (A hull.) Most boats and ships have only one hull, but a catamaran has 2 hulls. Have the children say, “catamaran.” We are going to make a catamaran.
- If they need guidance, have them use scissors to cut their hull tray into a capital H shape. Each of the long sides will be a hull.
- A catamaran also has a mast and a sail so add back the sail or sails.
- Ask, “Can anyone think of why you would want to have 2 hulls?” If no one guesses, ask, “Which do you think would turn over more easily – a boat with one hull or a boat with 2 hulls?”
YOU WILL NEED: sailboats and scissors
- If not limited by time, watch the below video of catamarans.
Fun clips of catamarans racing and capsizing
Jet Power
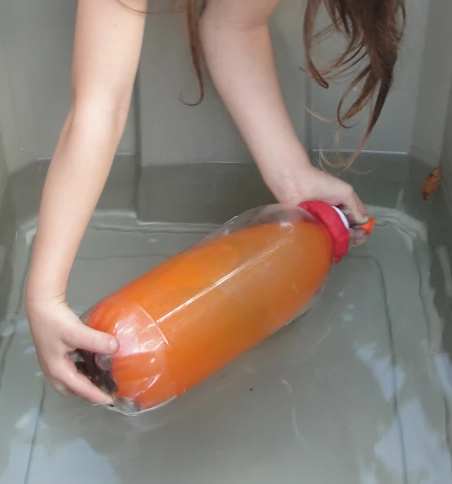
10a. Most boats and ships have propellers which push them along. The propeller cuts through the water, pushing it back behind the vessel. This push against the water propels or makes the vessel move forward. A jet-propelled boat can travel at high speeds with a propeller. The jet, or fast-moving flow of water, pushes the boat along. We are now going to create jet-powered boats.
- Have children get their soda/water bottles with the hole in them and a handful of pebbles. They should drop the pebbles into their bottles to weigh them down.
- Help them to put clay around the bottle neck to weigh down that part of the bottle.
- Allow children to use sharpie markers to draw designs on their jet-powered boats while you work with individual children to fill up their boats.
- Give the child a balloon. Let them stretch it a bit. Tell them to not drop the balloon into the bottle. Work with them to place the balloon inside the bottle with the mouth of the balloon sticking out. Help them to stretch the balloon neck over a faucet tap and fill the balloon half full with water. Have them pinch the balloon neck closed.
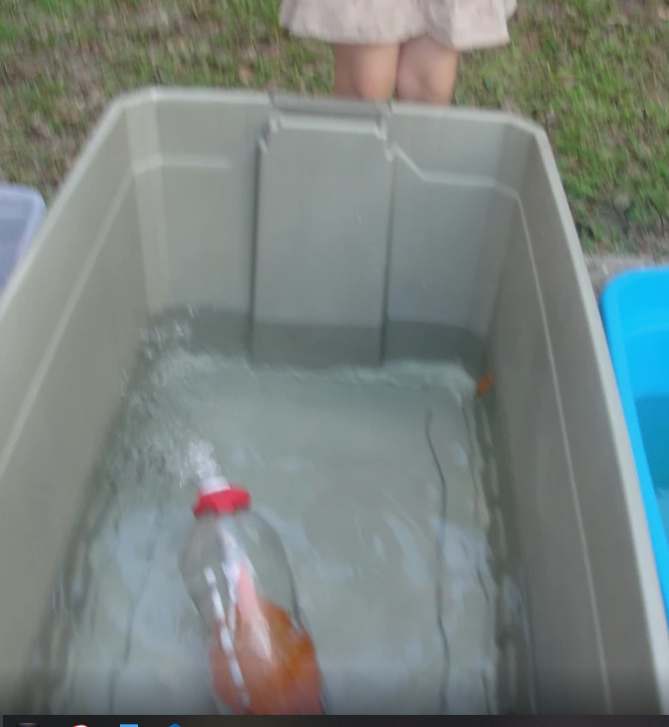
- Take them back outside. While they are still holding the end of the balloon, have them pull the balloon out of the neck of the bottle as much as possible (so it doesn’t just release inside the bottle). Have them put the bottle in the tub of water and then let go of the balloon. They can watch the jet of water shoot out and push the boat along. (Have them do this as soon as they are ready. Don’t have children wait around and then do it at the same time.)
- Explain that when the water shoots out of the balloon, it pushes against the water in the tub. This pushing force propels the jet boat forward. The quicker the water escapes from the balloon, the faster the boat travels.
YOU WILL NEED PER CHILD OR GROUP: balloon (not inflated), plastic soda/water bottle with a hole drilled or punched toward the bottom, small handful of peddles or pennies that will fit through the hole in the mouth of the bottle, ball of clay, sharpie markers, & tubs for water (shared)
Boat-Related Items

Trying to pick up an anchor
10b. (Optional) While the children are taking turns with their jet-powdered bottle boats, allow them to explore various boat-related items. We had an anchor, life-preserver, paddle (and a bucket of water for them to try it in), buoy, and rope.
YOU WILL NEED: boat-related items such as an anchor, life-preserver, paddle (and a bucket of water for them to try it in), buoy, and rope
Titanic
- Ask children if they can name any famous ships. Tell them that we’re going to read about the largest passenger steamship ever made at that time in 1912, almost 100 years ago. This “unsinkable” ship sank on its first voyage across the Atlantic Ocean. Read a book about the Titanic, Survivors the Night the Titanic Sank by Caryn Jenner.
YOU WILL NEED: Survivors the Night the Titanic Sank by Caryn Jenner or other book on the Titanic

- Ask the children from what they know about what floats and sinks, why did the Titanic sink?
- Show the children an ice cube tray. The Titanic had 16 huge compartments of air, called bulkheads. (Have the children repeat, “bulkheads.”) The compartments of the ice cube tray represent the individual bulkheads of the Titanic.
- [Place the army men on top of the ice cube tray.] I’m adding the toy people to remind you that there were over 2,000 people (dads, moms, brothers, and sisters) on the Titanic.
- After the ship hit the iceberg, the compartments of air (Ask, “Which are called what? bulkheads) began to fill with water. [Fill the first two compartments at the end of the ice cube tray with water – as if water is entering the hole in the side of the Titanic.] What happens? (Not a lot). [Tip the ice cube tray to the right so water leaks into some of the compartments and spills over the lips of the ice cube compartments until all the compartments on the right hand side and fills them] What happens.? (The tray starts to tilt at that end where the water has displaced the air. The water leaks over into the other compartments.)
- [Allow water to fill it the tray completely and then push the tray under the water – as most ice cube trays will float in water even if they are full.] lAs the water flows filling the compartments, the tray/Titanic sinks. The sinking of the Titanic is a great example of what happens when the air is forced out of a steel ship. The Titanic was designed to be unsinkable. It was made of steel and was watertight. Therefore, no water could get in from the outside. The problem was that the compartments inside the vessel were not “watertight”. Each compartment did not extend right to the top of the hull – effectively allowing air to flow from one compartment to another. When the iceberg ripped a horizontal hole in the side of the ship, the compartments started to fill with water. As five of the compartments filled with water, enough air was pushed out of the ship to lower the front end (the bow) deep into the sea. Water continued to pour over the top of the breached compartments into those that were still full of air. The more the Titanic sank, the more water poured into the air- filled compartments and the heavier the vessel became. Eventually, air was forced out of the hull so that the whole ship became heavier than the water around it and consequently the Titanic sank, along with about 2/3 of the passengers and crew.
YOU WILL NEED: 1 ice cube tray, some army men or other toy people who can get wet, 1 plastic container (like a plastic shoe box – it needs to be large enough to hold the ice cube tray) filled with ice water, & towels

13. (Prep: Ahead of time, fill your 2 bowls with ice and water and put them in the freezer. You’ll want them to be as cold as possible.) Many people died of hypothermia. The Atlantic Ocean water was so cold that it froze the people to death. The water was 28 °F/-2°C. Divide children into 2 groups. Have them place a hand in one of the bowls of ice water. See who can keep it in there the longest. The people left in the ocean didn’t just have a finger in the water. Their entire body was in the water for over an hour before ships came to try to rescue them. It was a very unfortunate event.
YOU WILL NEED: 2 big bowls, ice, & towels
- If you’re not limited by time, watch the below video on the Titanic.
Exploring the Titanic on the ocean floor
Hovercrafts
Hovercrafts
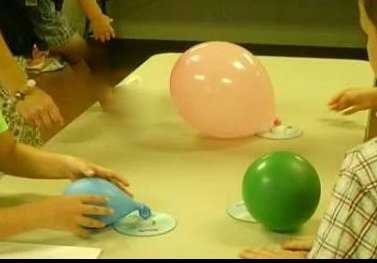
- The hovercraft is an invention of the 20th century. It can travel on water or on land. The engines suck in air and then pump it downward. This creates a cushion of air that keeps the hovercraft from touching the surface over which it is traveling. The passengers enjoy a smooth and bump-free ride.
- To make a hovercraft, use hot glue guns to help the children to glue a pop-top bottle lid over the hole of a CD or a Styrofoam plate that has a hole punched out through the middle.
- Have them attach the balloon to the opening of the lid. Push the stem of the balloon as far as you can down the bottle lid.
- Have them open the sports bottle lid and blow air into the balloon through the hole in the CD/plate. Have them close the lid so the air doesn’t escape.
- Have them place them on the group, and open the lid so the air is released. The hovercraft should float across the floor.
- Allow them to inflate the balloons and release their hovercrafts a second time.
YOU WILL NEED PER CHILD: balloon (not inflated), CD or Styrofoam plate with hole punched through the middle, and pop-top from sports bottle or dishwashing soap {must be able to be popped up & down & be able to hold the mouth of a balloon] and hot glue gun [to share]
This shows the hovercraft model we are making
Review
- Review what we learned by asking questions such as: If a liquid is less dense than water, will it float on the top of water or will it sink under the water? (float) When we dropped different objects into the cups with liquids that were different densities, what did you discover about the relationship between densities of liquids and the buoyancy of objects? (objects of different densities will float in different densities of liquids) What is a hydrometer used to determine? (density of water) How might the difference in densities of water affect how much cargo you could put on a ship? (You might have to put less cargo on the ship if you are sailing into a type of water that has a different density from the one at the port at which you are receiving your cargo.) What are Plimsoll lines used to indicate? (How fully ships can be safely loaded under a variety of water and climate conditions.) What does a sailor say when he means the left side? (port) What does he say for the right side (starboard) What do many boats use to direct the boat to the right, left, or straight ahead? (rudder)What type of triangle shape tends to be the favored design for sails? (right triangle) How does a jet-propeller work to move a boat? (The propeller cuts through the water, pushing it back behind the vessel. This push against the water propels or makes the vessel move forward. The jet, or fast-moving flow of water, pushes the boat along.) What famous ship that sank did we learn about? (Titanic) What part of it that was filled with air got filled with water after it hit an iceberg? (bulkhead) What type of ship did you make today that is supposed to sink and float? (submarine or submersible) What type of ship did you make today that is supposed to travel on water or on land? (hovercraft) How does it work? (The engines suck in air and then pump it downward. This creates a cushion of air that keeps the hovercraft from touching the surface over which it is traveling.) What type of boat has 2 hulls (a catamaran) Why would you want to have 2 hulls? (It won’t turn over as easily in choppy water) What was your favorite activity from today?
More of Our Favorite Picture Books
- Boats by Ruth Lachman
- Boats by Gallimard Jeunesse
- Snoopy’s Facts & Fun Book about Boats by Charles M. Schulz
- The Big Golden Book of Boats and Ships by Patricia Relf
- The Boat Book by Joe Kaufman
- The Impossible Voyage of Kon-Tiki by Deborah Kogan Ray
- Submarines (Step into Reading) by Sydelle Kramer
- Robert Fulton by Steven Kroll
- The Titanic: Lost and Found (Step-Into-Reading, Step 4) by Judy Donnelly
- The Story of Submarines by George Weller, which is a 200 page chapter book that is part of the Landmark book series
- Robert Fulton and the Steamboat by Ralph Nading Hill, which is a 176 page chapter book (with illustrations) and is part of the Landmark book series
Ready for the next lesson?
Build an aluminum foil barge that can hold the most pennies, experiment with what floats and sinks and why, create working models of various ships and a submarine, design and build a variety of airplane and parachute models, and more during this 5 part hands-on unit study on floating and flying.
- Buoyancy and Floating Lesson Plan – This is part 1 of a 5 part hands-on unit study on Floating & Flying (Fluid Mechanics). This week’s focus is buoyancy (floating). Build an aluminum foil barge that can hold the most pennies, experiment with what floats and sinks and why, explore the relationship between density and buoyancy, and more!
- Floating Ships and Boats Lesson – This is part 2 of a 5 part hands-on unit study on Floating & Flying (Fluid Mechanics). This week’s focus is ships and boats. Create working models of sailboats, submarines, and hovercrafts, test out jet power, examine the impact of density of liquids and surface tension on floating, and more!
- Air Pressure and Aeronautics Lesson – This is part 3 of a 5 part hands-on unit study on Floating & Flying. Discover the properties and power of air as you watch as air pressure blows up a balloon, sucks an egg into a bottle, collapses a can, holds water in an upside-down glass, and more!
- History and Forces of Flight Lesson – This is part 4 of a 5 part hands-on unit study on Floating & Flying. Learn about the history of flight from the time of the Greeks through present day. Design and redesign foam fliers, balloon jets, parachutes, drag-chutes, and more as you examine the four forces of flight!
- Paper Airplanes & The Four Forces of Flight Lesson – This is part 5 of a 5 part hands-on unit on Floating & Flying. Have fun while creating various types of paper airplanes in order to examine the relationship between plane design and the four forces of flight!
- Floating and Flying Unit Presentations and Field Trip Ideas – This is the culminating activity for the five part hands-on unit on Floating & Flying. The children made ship and plane-themed dishes (recipes are included) and presented on famous planes or ships. Also included is where we went for field trips during this unit.
Konos Volume I
Konos Curriculum
Would you like to teach this way every day?
I use Konos Curriculum as a springboard from which to plan my lessons. It’s a wonderful curriculum and was created by moms with active children!
If you’re new to homeschooling or in need of some fresh guidance, I highly recommend Konos’ HomeSchoolMentor.com program! Watch videos on-line of what to do each day and how to teach it in this great hands-on format!
© 2011 Shannon
Comments, questions, or ideas? – Please leave a note to let me know you dropped by. I LOVE hearing from you!
Jazroockfree on June 12, 2012:
The lens is very good, because they provide some information about the knowledge of physics lessons. The topic of ships and boats that are very relevant. I also have several topics on ships and boats, you can take the time to visit my lens.Thanks for sharing.Success for you.
CruiseReady from East Central Florida on June 04, 2012:
I do so love it that you have made a lesson plan about one of my very favorite topics – ships and boats!
SnoopyGirl1 on December 10, 2011:
You are amazing! Your lenses are going to be my resource when I begin Konos!
Leave a Reply