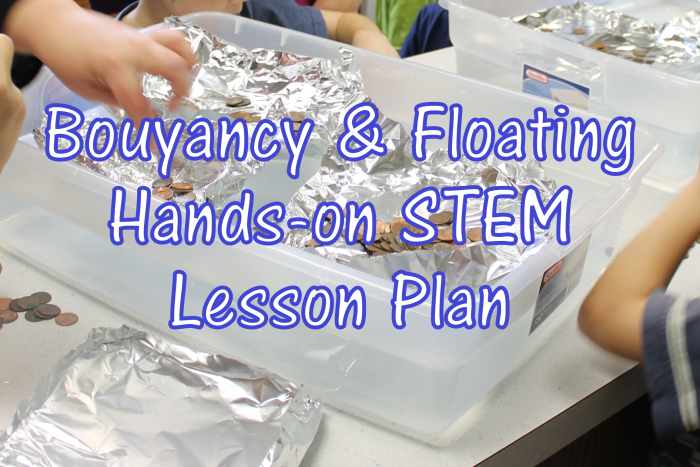
Testing out aluminum foil barges to see which design can hold the most cargo (pennies)
This is part 1 of a 5 part hands-on unit study on Floating & Flying (Fluid Mechanics). This week’s focus is buoyancy (floating). Build an aluminium foil barge that can hold the most pennies, experiment with what floats and sinks and why, explore the relationship between density and buoyancy, and more! My lessons are geared toward 4th-5th grade level children and their siblings. These are lessons I created to do with a weekly homeschool co-op. We meet each week for 2 1/2 hours and have 33 children between the ages of 1-13. Use these fun lessons with your classroom, family, after school program, camp, or co-op!
Devotional: Jesus Walked on Water
- Read & discuss Matthew 14:22-33. Say something such as:
- Some things sink and some things float. We can look at something and know from its weight, size, and so forth whether or not it will float or sink. What if I put this rock in this water? Would it float or sink? (Drop it in.) What about if it didn’t sink? What would we call that? (A miracle.) When something happens that is contrary to all the rules of science, we call it a…
- -Is it possible for you or for me to walk on water? This true event lets us know that Jesus really was God. He could do things that are impossible for people to do, such as walking on the water. This true story also helps us to understand that when God asks us to do difficult things, He will be there watching and supporting us. Isn’t that encouraging to know?
YOU WILL NEED: a rock and a container of water
What Floats? What Sinks?

Determining what floats and sinks and why
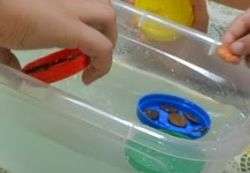
2. (Prep: Fill 4 containers of water.) Ask, “What makes things float?” Let a few children share their ideas. Divide children into 4 groups of 3-4.
- Give each group a bowl/container of water and some objects.
- Ask the children to make a hypothesis and to each grab an item they think will sink. Let them test their hypothesis by dropping it in the water. Was their hypothesis correct? Do the same with something they think will float. Repeat with something they’re not sure if it will float or sink. Drop in any remaining items.
- Divide the objects into what 2 groups: items that will float in water and items that will sink in water.
- After the groups have divided their items, have them each use some words to describe each of their piles. (For example, they might say “heavy” items will sink while “light” ones will float.)
- After the children have shared their descriptions, hold up a penny and an apple. Ask, “Which item will float?” Demonstrate that the apple floats in water and the penny sinks.
- Ask, “Which one weighs more?” If the apple weighs more than the penny, then why does it float? We’ll explore that concept today.
YOU WILL NEED PER GROUP: container of water, towel, and items to test such as apple, penny, paper clips (plastic and metal), toothpick, bottle/milk cap, marbles (plastic and glass), balls (golf ball and ping pong ball), plastic bead, sponge piece, pencil, piece of aluminum foil, grape, paper, piece of Styrofoam, plastic spoon, metal spoon, orange, & key lime
Joke: How can you tell the gender of an ant?
Answer: Drop it in water. If it sinks, girl ant. If it floats…
Altering and Defining Buoyancy
- After the children have tested the buoyancy of all their items, find out if all the groups came up with consistent results. (“Did the marble sink for everyone? How about the plastic beads? The aluminum foil?”)
- If there are differences in their findings, ask the children to speculate why this could be. How could they explore this further? Did the difference have to do with different procedures?
- Ask, “Is there a way that you could change some of the sinkers into floaters or make the floaters into sinkers?” If no one has ideas, ask, “What would happen if you changed the shape of the aluminum foil? What happens if you peel the orange?” Try it!
- First have the children crumple the aluminum foil into a tight ball and see if it floats or sinks. Use a mallet or hammer to pound both sides to change the surface area of the aluminum foil and to get out all the air pockets. Does the SAME piece of aluminum foil float or sink now? Why? What changed?
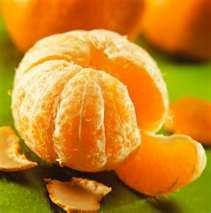
- Have one of the children peel their orange and drop it in the water the same time as another person drops in their unpeeled orange.
- An unpeeled orange floats because its skin has pockets of air. Ducks and geese float for a similar reason. Their feathers contain tiny tubes filled with air. Sometimes young swimmers use air-filled water wings to stay afloat. When you removed this layer of air pockets (the peel) from the orange, it sinks a bit, just like what would happen if you removed water wings from some young swimmers. (Note: The peeled orange will not sink. It just won’t float as high as the unpeeled orange.)
- Remove all items have been removed from the water and placed on towels to dry.
- If desired, allow all children to peel their oranges and eat them. Assist children who need assistance in peeling their oranges.
YOU WILL NEED: aluminum foil, mallet or hammer, clementines or other easy to peel oranges/tangerines, and napkins
- Refer back to the words the children originally used to describe items that float or sink. Ask the children to look for commonalities among the items that float and those that sink.
- Which descriptive words would they change? Are there words they would add?
- Introduce vocabulary: objects that float can be described by a new word, “buoyant.” Have everyone say the word, “buoyant.” Ask, “What does it mean for an object to be buoyant?”
- Read a book on buoyancy such as Sinking and Floating by Natalie Myra Rosinsky.
YOU WILL NEED: Sinking and Floating by Natalie Myra Rosinsky or other book on buoyancy
Density, Coke, and Diet Coke
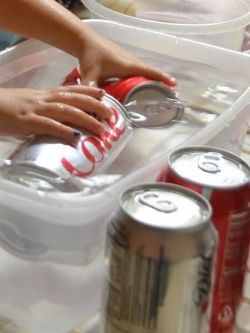
- Pass out a can of Coke and a can of Diet Coke to each group.
- Ask them to form a hypothesis. “Will both sink, both float, or one sink and which one?” Let all the children vote to show their hypothesis.
- Have each group drop their two cans in water.
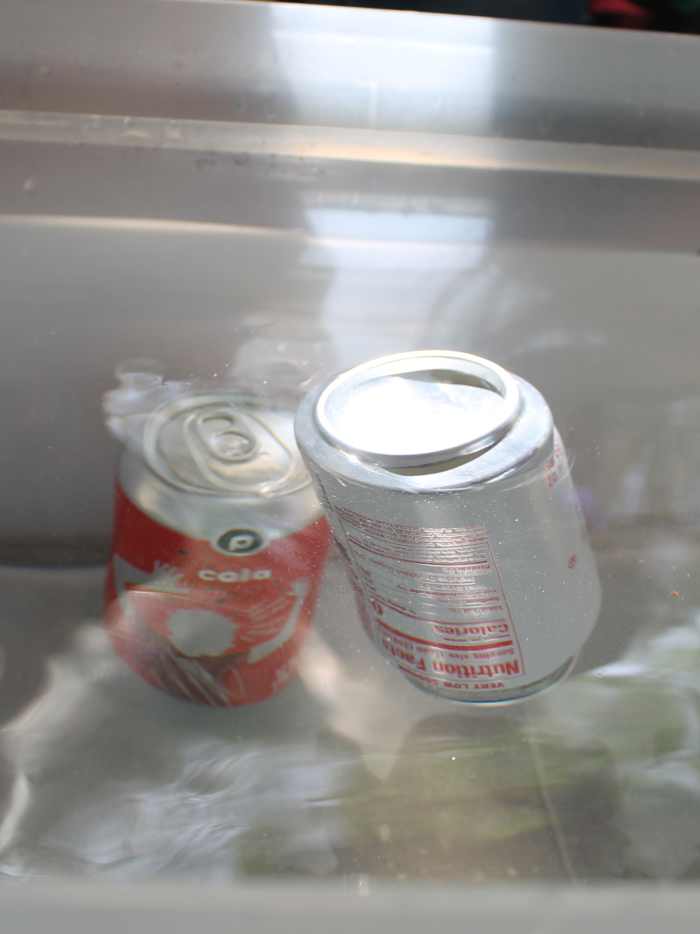
- What happened? Why?
- Aren’t they the same volume? (Yes, 12 fl. oz.) Don’t they look the same?
- Explanation: The Coke sank. The Diet Coke floated. The Coke, the denser can, must have more mass because you know they have the same volume. Can anyone guess what the difference might be? (Corn syrup, which is used to sweeten the regular Coke is denser than water. Diet Coke is sweetened with an artificial sweetener like aspartame, which is less dense than water.)
YOU WILL NEED: 4 cans of Coke (generic is fine), 4 cans of Diet Coke (generic is fine), large container filled with water (must be at least 2.5 times deeper than the cans or it won’t be as noticeable) & towels
Density
Same volume, different masses (because different items inside) = different densities
Same volume, different masses (because different items inside) = different densities
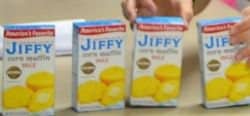
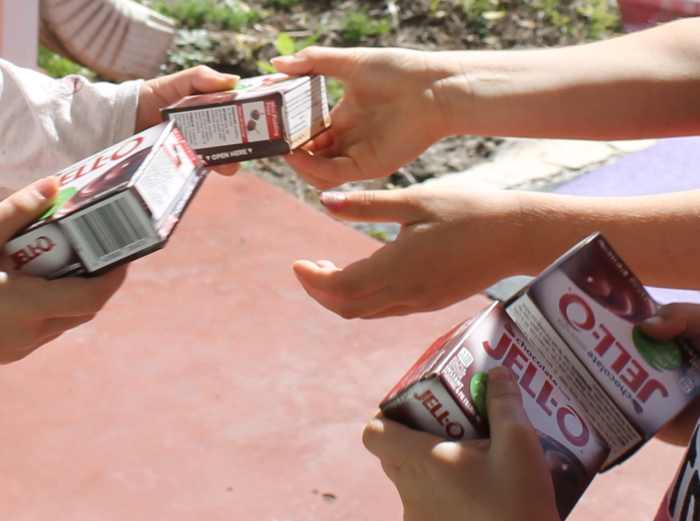
- Let children pass around 4 identical boxes that have been filled with different materials. Let children handle the boxes, but do not let them open the boxes.
- After everyone has held all the boxes, ask them to compare the features of the four boxes. They should note that the boxes look identical. Tell them that another way of saying that the boxes are all the same size is to say their volumes are identical. Have the children say, “volume.”
- They should also note that the boxes had different weights. Tell them that another way of saying that is to say they have different masses. Have the children say, “mass.”
- Once these two observations have been made, you can let the children know there is one word that includes both of those observations. That word is density. Have them say the word, “density.”
- Density tells us how much material is packed into a given amount of space. It tells us how the masses of two different objects would compare if they both had the exact same volume. The dry cereal (or popped popcorn) is not very dense. The material in the box does not weigh very much, because there is a lot of air occupying the spaces between the cereal flakes (or between the popped corn kernels, which themselves contain a lot of air, too). The sand and rice grains are denser; they can pack together more tightly in the box. Sand grains can pack very tightly together, and so the box containing them is the densest of all.
YOU WILL NEED: 4 identical containers (like macaroni & cheese boxes or Jiffy cornbread mix boxes) each filled with a different substance that would make them weigh different amounts (such as 1 filled with popcorn, 1 filled with rice, 1 filled with sand, and 1 filled with cereal) and securely taped closed
Density: Mass Per Volume
- Ask the children how it could density can be quantified.
- Ask: “What measurement do we use for describing length?” (meters, feet, inches, etc.). “What do we use for measuring temperature?” (degrees Fahrenheit or Celsius) “What do we use for describing speed?” (miles per hour)
- Ask: “What units do you think we should we use for describing density if it is the amount of material that fits into a given volume?” Remind them of the 2 words you had them say before: mass (or weight) and volume are the two quantities needed. Density is defined as the amount of mass per volume of a substance. Per always means divide. They are already familiar with speed: to find the speed, they divide the miles traveled by the hours it took to travel them. This division results in the speed expressed as miles per hour.
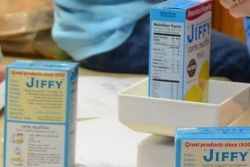
- Divide the children into 4 groups. Give each group a box. Have the children use rulers to measure the sides of the boxes. On a sheet of paper [you, the parent] write the 3 measurements and multiply them together to get the volume of the box.
- Have each group weigh their box on the kitchen scale to determine their weight/mass. You, the parent, will write those on the paper.
- Now try to lead the children to help you write out the density of each box (including the units, oz./in3). Scientists really use grams and centimeters, so the measurement for density is really g/cm3. The heavier box should, of course, have a higher density.
YOU WILL NEED: 1-4 kitchen or postal scales (the kind that can weigh 1-16 ounces), 2 sheets of paper, a writing utensil, & 4 rulers
Buoyancy & Surface Area
- Ask, “How do you think density relates to buoyancy, or the ability of an item to float?” Let children share their ideas.
- Hold up a golf ball and ping-pong ball. They have similar volumes but one is much heavier, therefore, more dense.
- You already tested these. Ask, “Which item floated? Which is more dense?”
- More density = less buoyancy
YOU WILL NEED: a golf ball and ping pong ball
- Ask the children, “How does a boat or ship float carrying hundreds of pounds worth of cargo while that same cargo would sink to the bottom of the ocean if dumped overboard?” Let them share their ideas.
- Ask them who went swimming this summer. Ask if anyone is able to float on their backs in the water. Allow for 1 or 2 children to describe what they do to float in the pool.
- When you are in a pool and you stretch out your body, you will float. But if you wrap your arms around your legs and curl up into a ball, you will sink. It all has to do with how much water is pushing against you and a little scientific principle called buoyancy. Ask, “Have you ever heard that word buoyancy? What does it mean?”
- When you stretch out flat, more water pushes against you since your body is laid out flatter and has more surface area. Have the children say, “surface area.”
- Have the children stand up, stretch out their arms and spread out their legs and say, “More surface area.”
- When you curl up into a ball, your body is more compact and less water is pushing against you. You have less surface area. Have the children squat down low and curl up into a ball and say, “Less surface area.”
- Ask the children to show you more surface area again. Have them show you how to have less surface area.
Surface Area & Boats
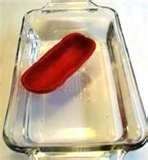
13. (Prep: Fill 8 containers of water.) Group children into groups of 3-4, and have each group share a container of water. The children will also need their modeling clay.
- Have the children lay the cylinder-shaped piece of clay into the water. (If it isn’t already cylinder shaped, have them first roll it into a cylinder shape.) What happens?
- Now have them roll the clay into a ball and place it in the water. What happens?
- Have them take the same piece of clay and fashion it into a flat-bottomed boat shape and then place it in the water. What happens?
- Ask, “Why did the first 2 shapes sink and the boat (ship) shape float?” Let children share their ideas.
- Explain that if the total area of the object that makes contact with the water is large enough, the object floats. The object must make room for its own volume by pushing aside, or displacing, an equivalent (or equal) volume of liquid. The object is exerting a downward force on the water and the water is therefore exerting an upward force on the object. Of course the floating object’s weight comes into play also. The solid body floats when it has displaced just enough water to equal its own original weight. This principle is called buoyancy. Have the children again say, “buoyancy.”
- The lump of clay pushed down on a small area of water, so it sunk. Why do items that are hollowed out seem to float best? The ship-shaped clay pushes down on a bigger area of water. The water can push up against more of the clay and so that the ship-shaped clay can float.
YOU WILL NEED: clay (do NOT use play-doh or self-hardening clay), containers of water (like plastic shoe boxes), & towels
Boats and Cargo
- Let’s consider the cargo in the ships or barges. Have everyone get their pennies.
- Ask, “What is a hypothesis?” (An educated guess) Tell them to make a hypothesis: Will the pennies sink or float? Have them drop a few pennies in the water.
- Ask, “Is there a way you could use your clay boat to help the pennies float?” Let the children try.
- Ask, “What happens if you put all the pennies on only one side of your boat?” Try it. It will start to sink! A ship’s captain has to be careful to place his/her cargo evenly on the ship. They usually start in the middle and work their way outward.
- What happens when you add all the pennies into one clay ship? Try it. Tell them, “You’re increasing the mass without increasing the volume. Your ship is going to sink!”
YOU WILL NEED: pennies
Barge Building Contest
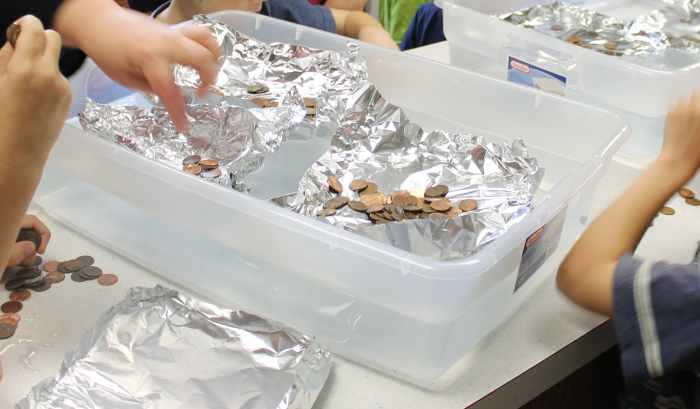
- Ask children what they learned about buoyancy, density, and surface area/displacement. (Let them answer.) Tell them that we are going to apply what they learned to barge-building.
- We will have a contest to see who can build a boat hull that will hold the most mass while staying afloat. Children will want to achieve the highest loading capacity. Have the children repeat, “loading capacity.” Ask them what they think “loading capacity” means.
- Give each child a 12″ x 8″ piece of aluminum foil. They can test their ship as many times as they would like before the final “contest” but they may not get a new piece of foil. If their boat tears, they will have to repair it.
- If you have multiple ages, divide the children into 3 groups by approximate age (oldest, middle, & youngest) for their competition group. (We had 6 and under, ages 7-9, and ages 10+.) From each age group select the barge that can hold the most pennies.
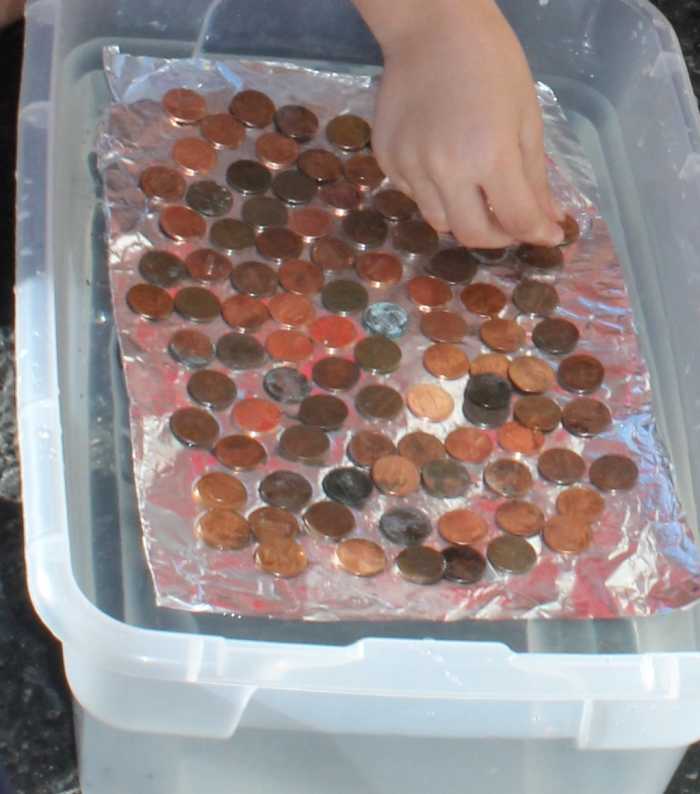
- Look at the winning barge designs. Ask, “What can you say about your hull design? What is the equivalent ‘boat’ to your design? (Canoe, barge, speedboat, etc.) How did the placement of pennies affect the number the boat holds?”
- The best designs are flat barges with small sides and larger surface areas. The placement of pennies also makes a difference in the number held.
- The record for one sheet of 8″ x 12″ foil (not heavy duty foil) is around 280 pennies.
YOU WILL NEED: 24 sheets of aluminum foil that are all about the same size (about 12″ x 8″), pennies, water containers (some that are larger than plastic shoebox size), & towels
Noah’s Ark

- Ask, “Who can name a boat design that is mentioned in the Bible?”
- Read Genesis 6:15-16.
- Ask the children, “When you were designing your aluminum foil ships, were you trying to design a fast-sailing ship? What was your main goal?” No, your goal was to have them hold the most cargo without sinking. That was God’s goal when giving Noah the design for the ark.
- The dimensions were at least 135 meters long (300 cubits), 22.5 meters wide (50 cubits), and 13.5 meters high (30 cubits). That’s 450 feet long, 75 feet wide, and 45 feet high!
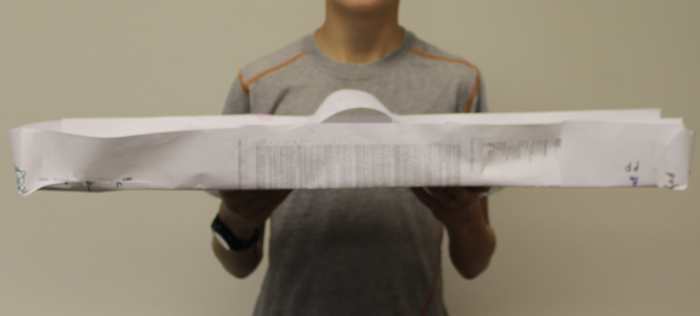
- We’ll draw a small scale model of the ark. Have each child get their piece of paper, writing utensil, and ruler. Have them measure 30″x5″x3”. Show them how to draw the rectangle in a 3-D manner.
- Task a group of 3 of the oldest children to instead make a 3D model of the ark using those dimensions. They will need scotch tape and scissors as well as the other items. A parent may need to assist them.
- Have the group show the tiny scale model of the ark. Ask, “Does it look like the ark you usually see in children’s books? What shape was it really?” (No. A rectangular box.)
YOU WILL NEED: Bible (or Bible app on phone), tape, 3 pairs of scissors, paper (3 sheets taped together), writing utensils, & rulers
Noah’s Ark (Actual Dimensions) & Review
17. If you have extra time, lead the children on a walk to see how big the ark was in real life. Take everyone outside. Take 450 steps (about 450 feet). Have everyone go together and count out loud together. God protected Noah and his family and the animals by designing the perfectly-shaped ship for keeping them afloat amidst the rains.
- Review what we learned today by asking questions such as: What makes something float? What is the big word we use for something that can float? (buoyant) What is the big word we used to describe size, as in all 4 of those boxes were the same size, so they had the same what? (volume) What is the big word we used to describe weight, as in all 4 of those boxes were different weights, so they had different what? (masses) What does density mean? (how much material is packed into a given amount of space; amount of mass per volume of a substance) How does density relate to buoyancy, or the ability of an item to float? (the more dense, the less buoyant) What did you find out from the Coke and Diet Coke can activity? (it’s sometimes difficult to guess buoyancy; ingredients can make a big difference) How can you change an object that floated before and make it sink? (changing its surface area/crumpling it up) How does a boat or ship float carrying hundreds of pounds worth of cargo while that same cargo would sink to the bottom of the ocean if dumped overboard? (spreading out the weight along a larger surface area). Show me your body with less surface area (they should curl into a ball). Shoe me your body with more surface area (they should spread out their arms & legs) What did you learn today while building your aluminum foil barge/boat? What did you learn about Noah’s Ark? What was your favorite activity we did today?
More Good Books on Buoyancy
- Captain Kidd’s Crew Experiments with Sinking and Floating by Mark Andrew Weakland
- Things That Float and Things That Don’t by David A. Adler
- The Sinking of the Vasa : A Shipwreck of Titanic Proportions by Russell Freedman
- Tell Me How Ships Float (Whiz Kids) by Shirley Willis
- What Floats in a Moat? Lynne Berry (a cute book just for fun)
- The Toy Boat by Randall de Sève
- Why Does It Float (Just Ask Book) by Chris Arvetis
- Floating and Sinking by Franklyn M. Branley
- How Does A Ship Float? (How? What? Why?) by Jim Pipe
Great Books on Archimedes
Archimedes is best known for his buoyancy experiments.
- Mr. Archimedes’ Bath by Pamela Allen, which is a 32 page picture book that is a cute story about the water displacement in Mr. Archimedes’ bath as animals pile in with him. He does of course shout “Eureka!”
- Archimedes Mathematician and Inventor by Martin Gardner is a 42-page well written bio with drawings. It is out of print but is worth finding!
Ready for the next lesson?
Build an aluminum foil barge that can hold the most pennies, experiment with what floats and sinks and why, create working models of various ships and a submarine, design and build a variety of airplane and parachute models, and more during this 5 part hands-on unit study on floating and flying.
- Buoyancy and Floating Lesson Plan – This is part 1 of a 5 part hands-on unit study on Floating & Flying (Fluid Mechanics). This week’s focus is buoyancy (floating). Build an aluminum foil barge that can hold the most pennies, experiment with what floats and sinks and why, explore the relationship between density and buoyancy, and more!
- Floating Ships and Boats Lesson – This is part 2 of a 5 part hands-on unit study on Floating & Flying (Fluid Mechanics). This week’s focus is ships and boats. Create working models of sailboats, submarines, and hovercrafts, test out jet power, examine the impact of density of liquids and surface tension on floating, and more!
- Air Pressure and Aeronautics Lesson – This is part 3 of a 5 part hands-on unit study on Floating & Flying. Discover the properties and power of air as you watch as air pressure blows up a balloon, sucks an egg into a bottle, collapses a can, holds water in an upside-down glass, and more!
- History and Forces of Flight Lesson – This is part 4 of a 5 part hands-on unit study on Floating & Flying. Learn about the history of flight from the time of the Greeks through present day. Design and redesign foam fliers, balloon jets, parachutes, drag-chutes, and more as you examine the four forces of flight!
- Paper Airplanes & The Four Forces of Flight Lesson – This is part 5 of a 5 part hands-on unit on Floating & Flying. Have fun while creating various types of paper airplanes in order to examine the relationship between plane design and the four forces of flight!
- Floating and Flying Unit Presentations and Field Trip Ideas – This is the culminating activity for the five part hands-on unit on Floating & Flying. The children made ship and plane-themed dishes (recipes are included) and presented on famous planes or ships. Also included is where we went for field trips during this unit.
- Fun, FREE Hands-on Unit Studies – Over the years I have posted over 30 science and social-studies based unit studies, compromised of more than 140 lessons. For each lesson I have included activities (with photos), our favorite books and YouTube video clips, lapbook links, and other resources.
Our favorite video clips on buoyancy and how ships float
This is a good short video clip on Archimedes
Konos Curriculum
Would you like to teach this way every day?
I use Konos Curriculum as a springboard from which to plan my lessons. It’s a wonderful Christian curriculum and was created by moms with active children!
If you’re new to homeschooling or in need of some fresh guidance, I highly recommend Konos’ HomeSchoolMentor.com program! Watch videos on-line of what to do each day and how to teach it in this great hands-on format!
© 2011 Shannon
Comments, questions, or ideas? – I LOVE hearing from you! Please leave a note to let me know you dropped by!
JoyfulPamela2 from Pennsylvania, USA on April 13, 2012:
Another great lesson! What I love about your lessons is that you combine public school and homeschool techniques to make them thorough, meaningful, and fun! Thank you! =D
firstcliq on March 04, 2012:
Well…..I am making my attempt at building a boat. It is a your experiment only 14′ long. LOL. You can check it out and get a chuckle if you like. http://www.squidoo.com/boat-building-will-this-one…
dessertlover on December 20, 2011:
This is a wonderful lesson plan! So many great ideas, and i love how it’s centered around the bible. Very neat!
KarenTBTEN on December 07, 2011:
Excellent resource. It looks like you’ve really put some work on taking science experiments that children might do in the classroom and making them accessible to home schooling families.
Leave a Reply